How to Photograph a (Full) Moon or the Milky Way – Camera Settings, Gear & Beginner Tips for Astro Photography
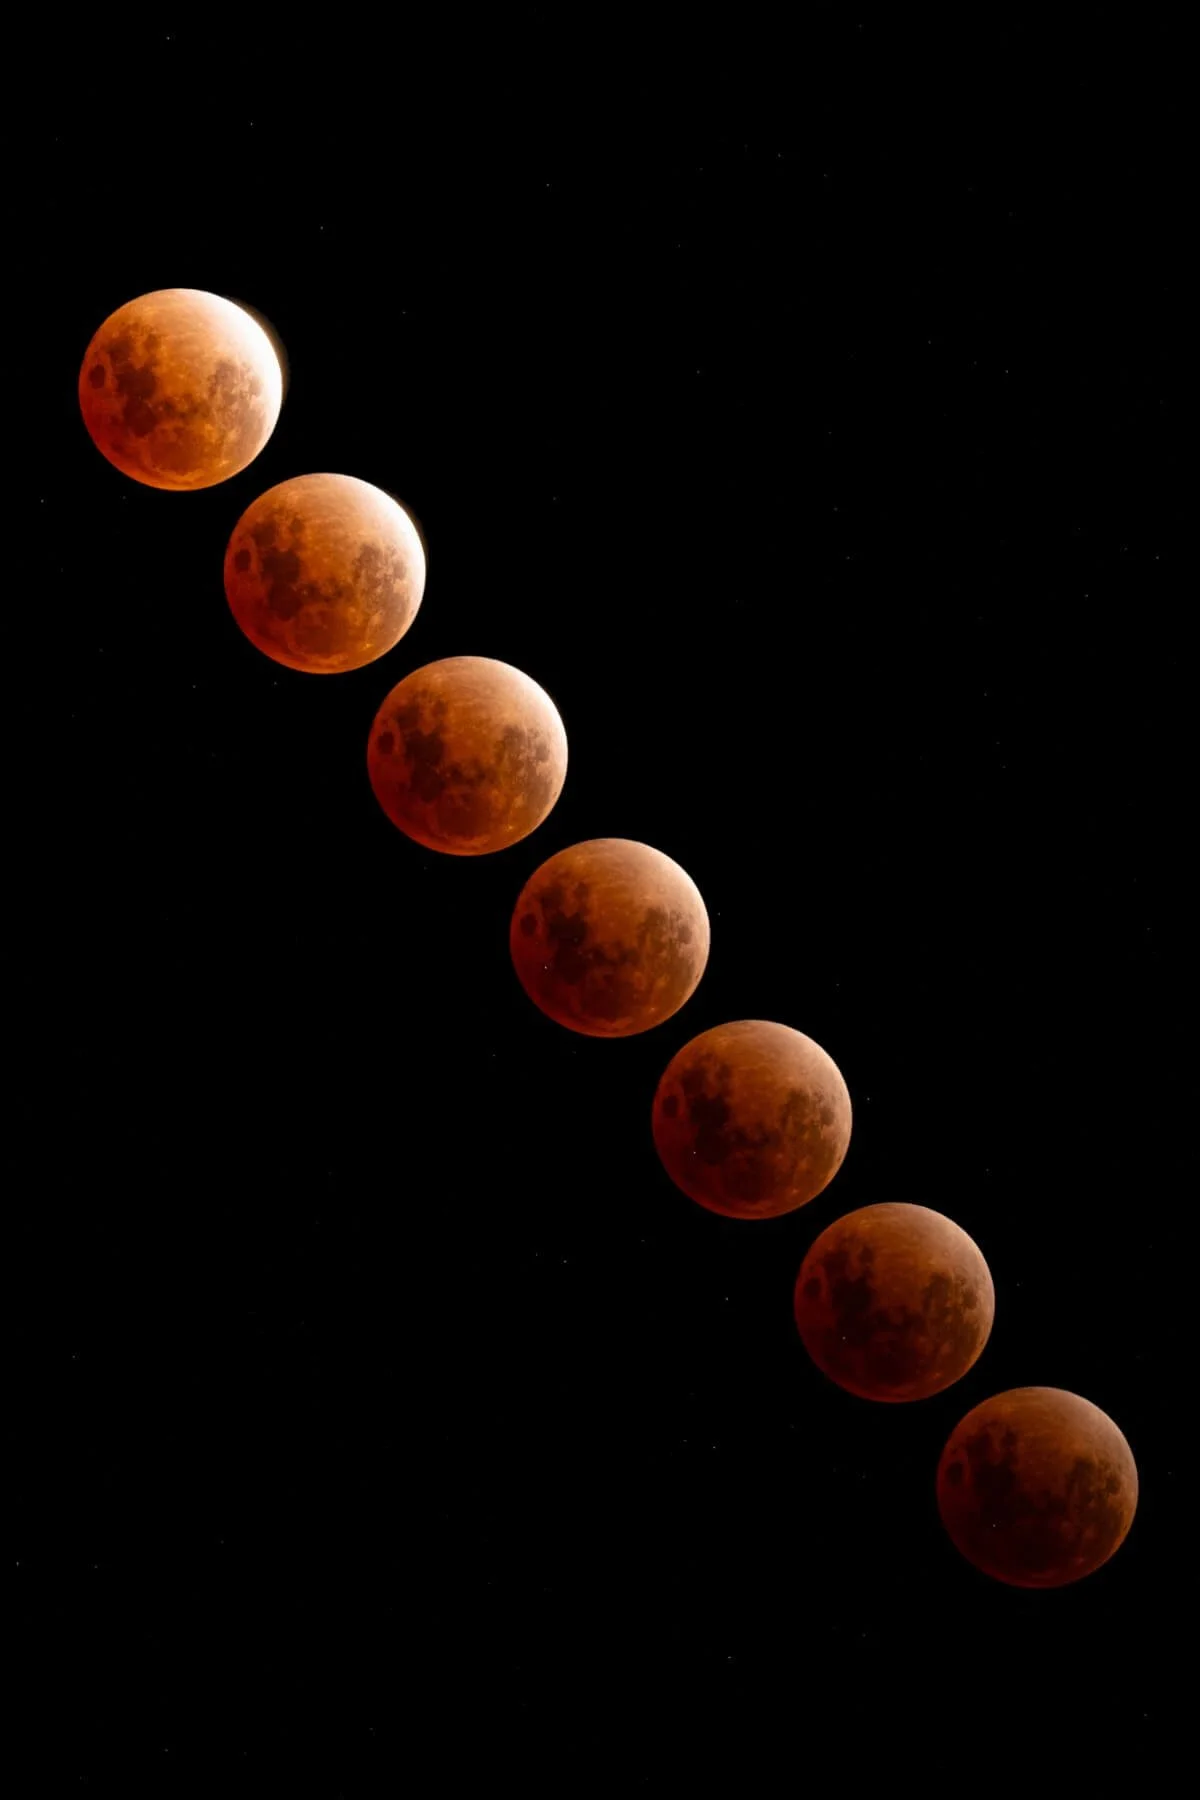
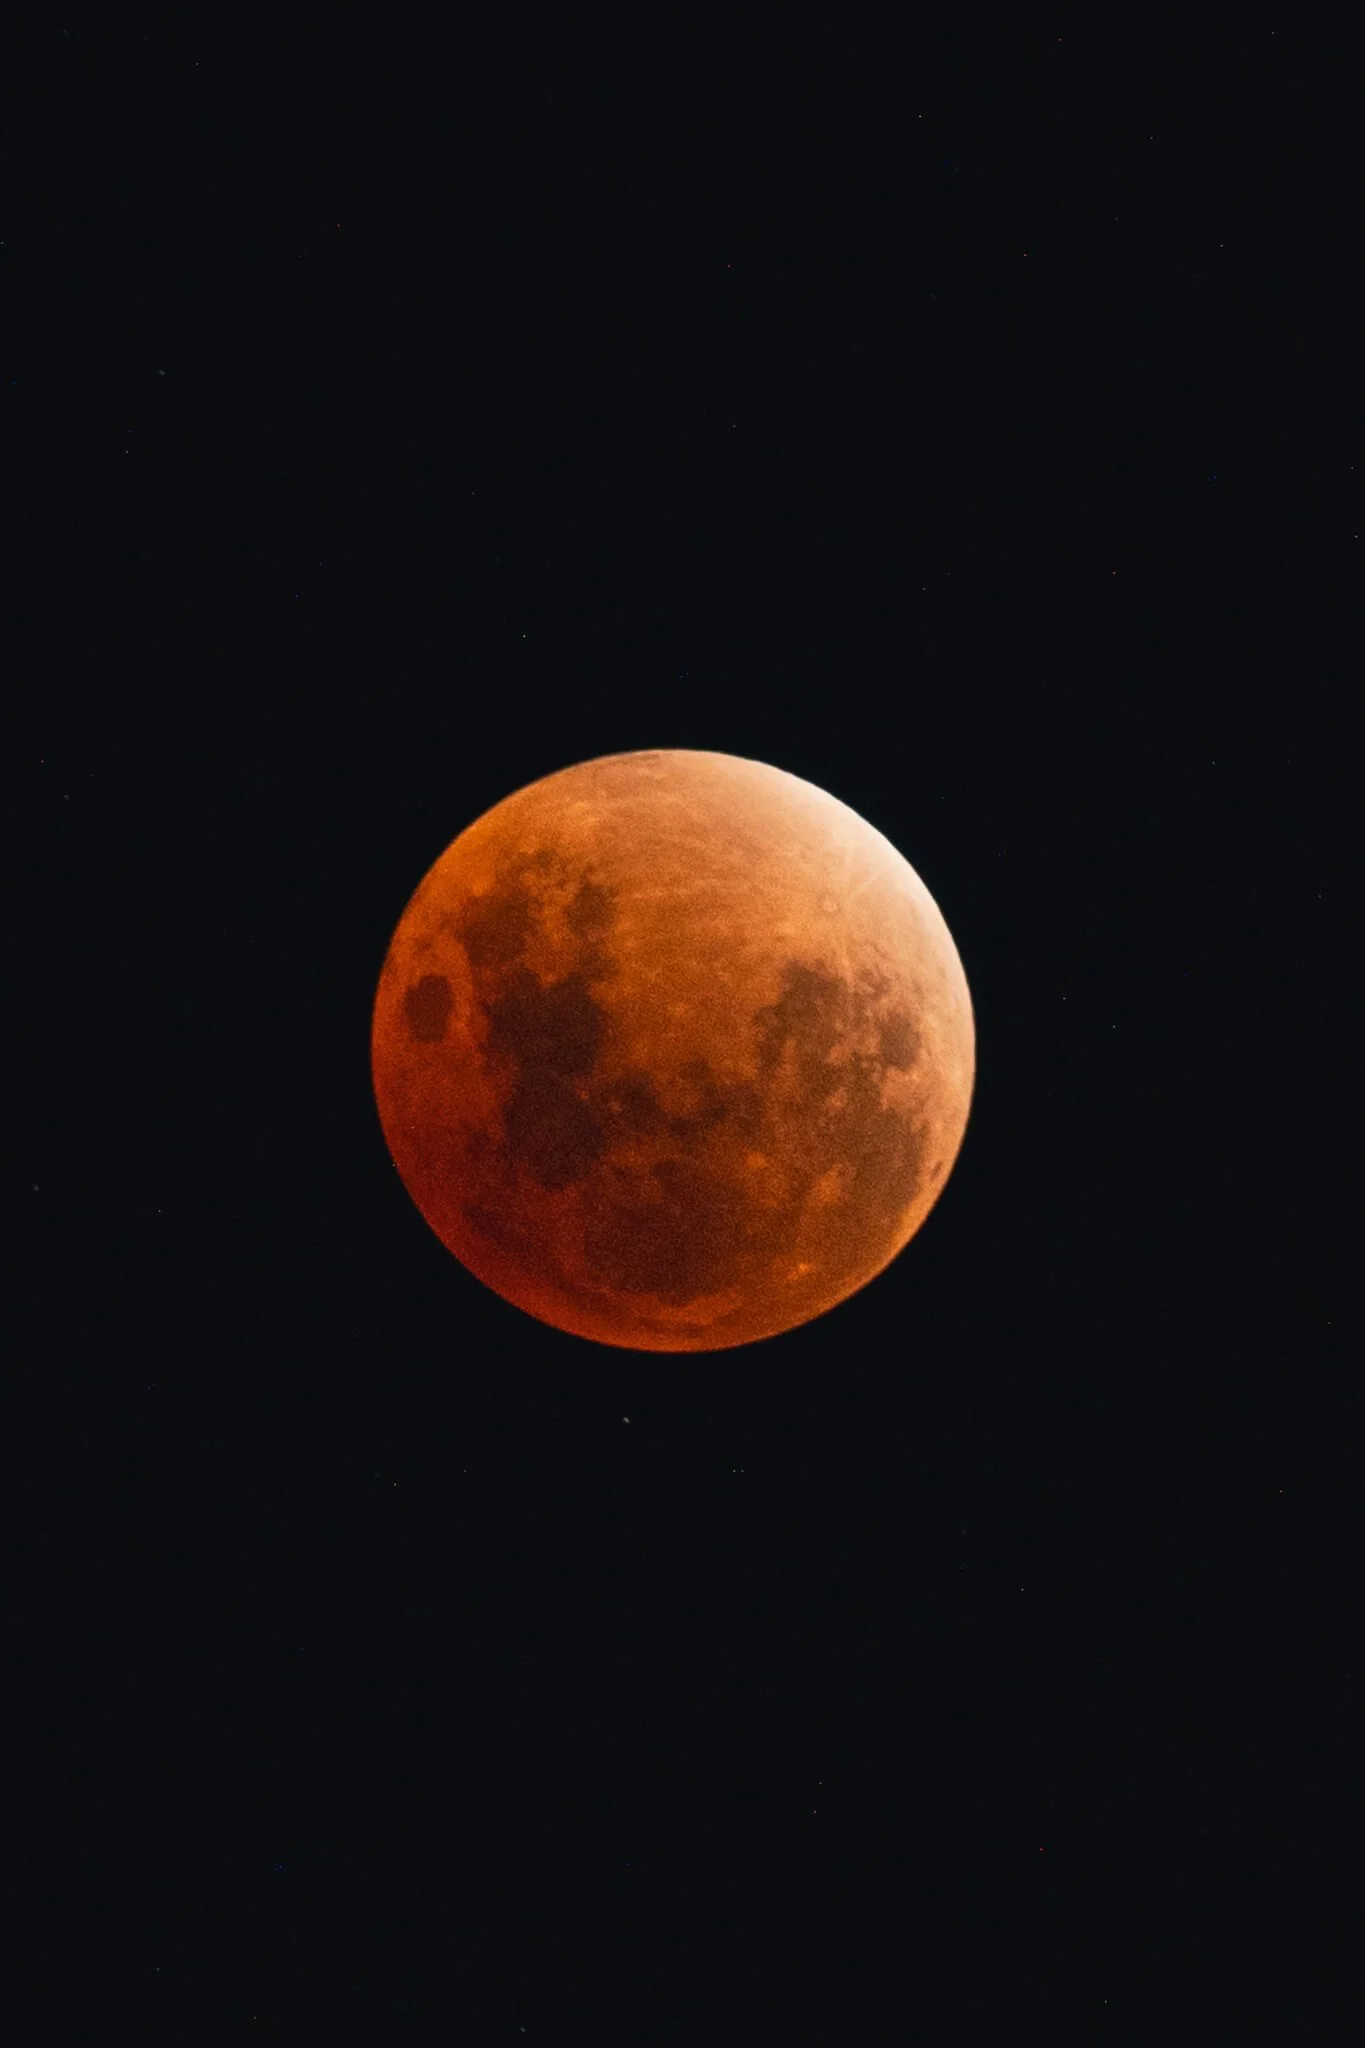
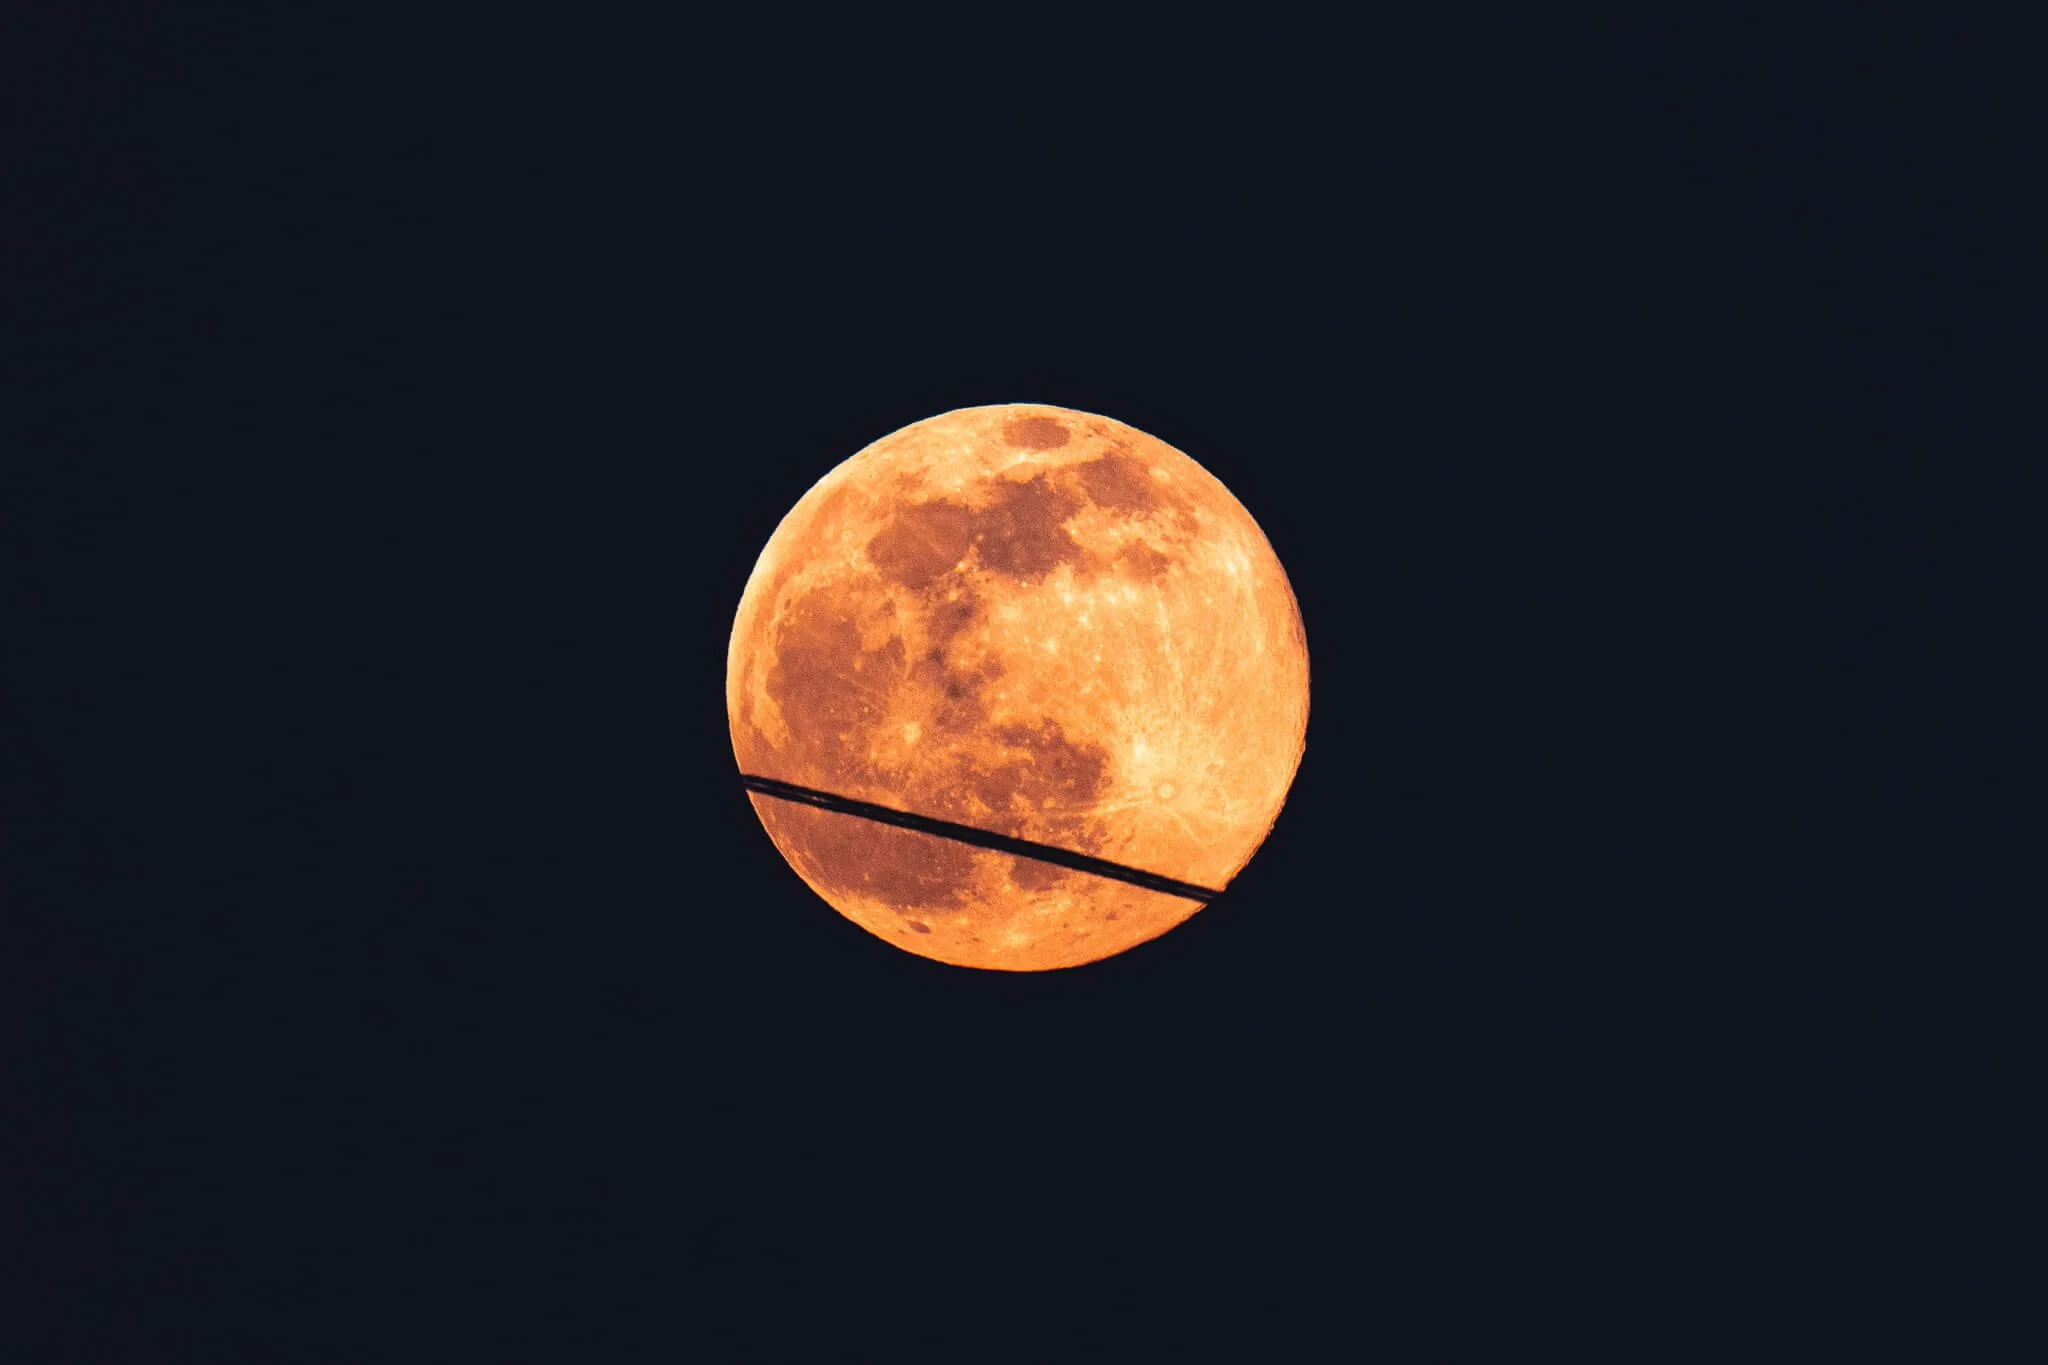
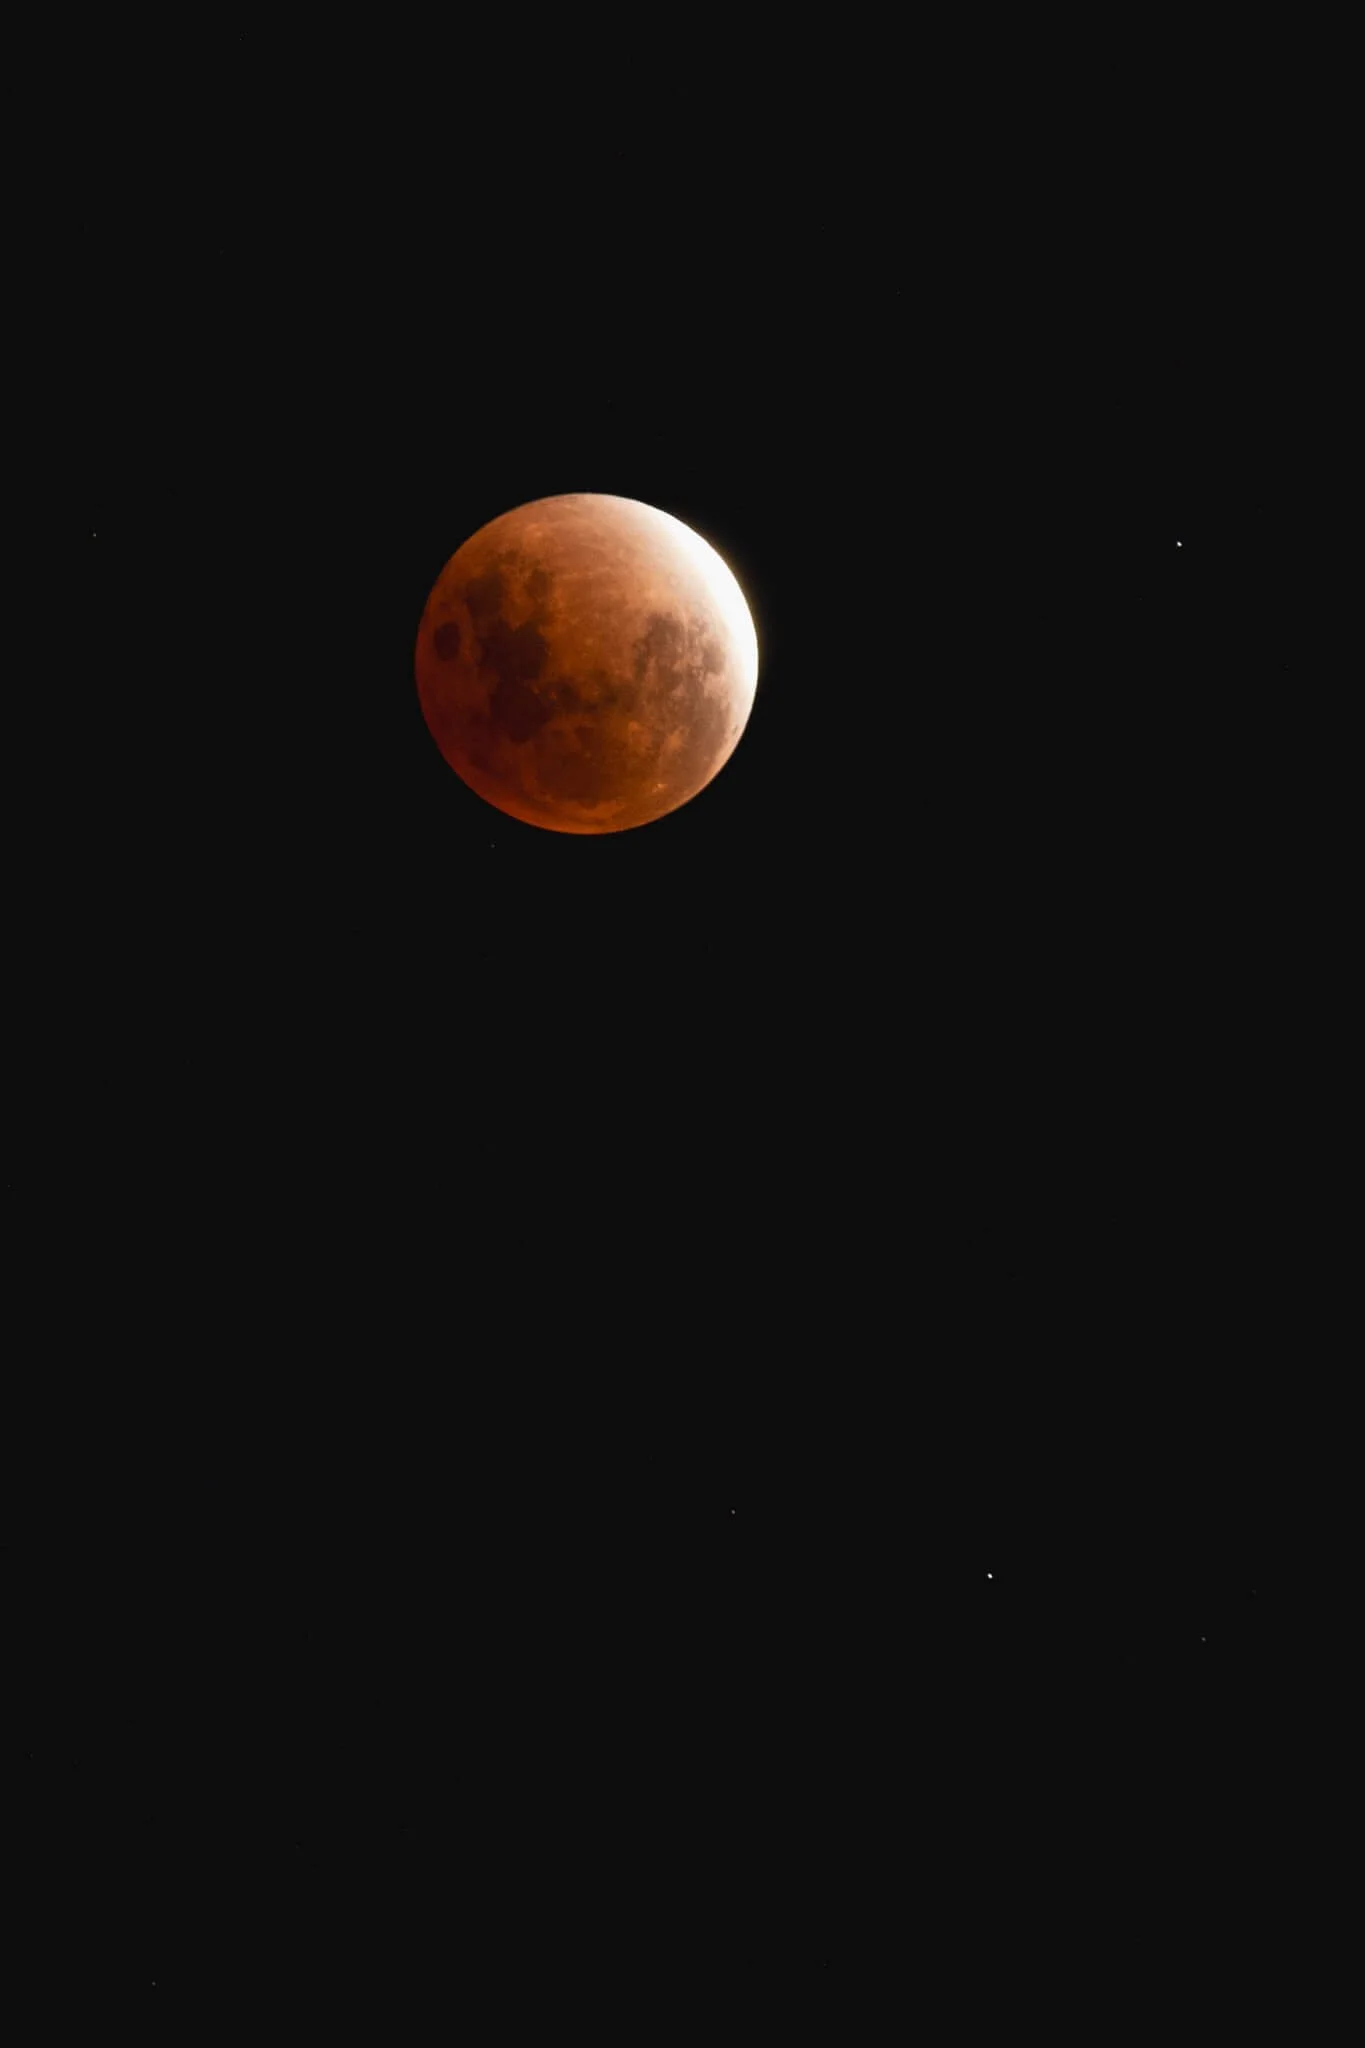
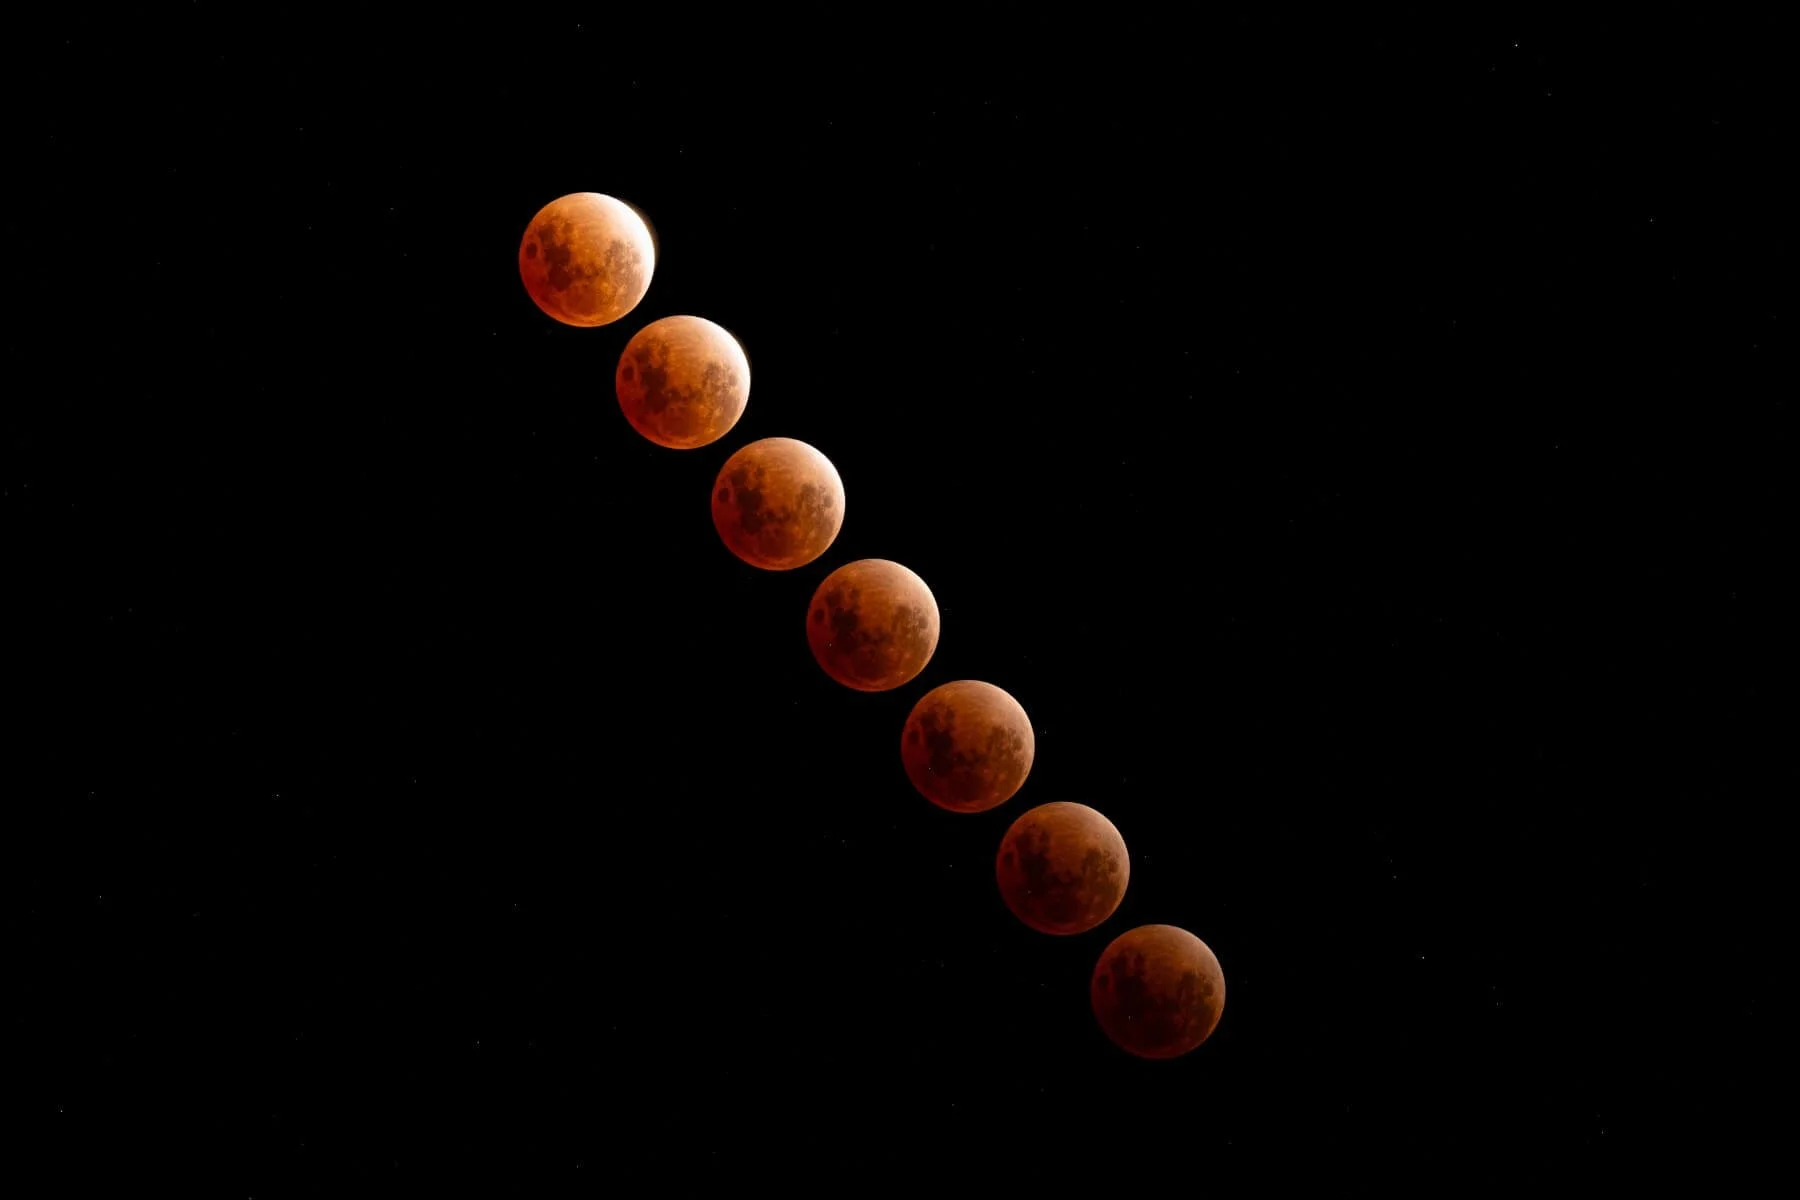
A few nights ago, the sky put on one of its best shows: a total lunar eclipse, and a blood moon at that. I had been tracking the date for weeks, and even though I was shooting from my own backyard in the middle of the city, I was not going to miss it. Light pollution and all, I grabbed my Sony a7III and my Sony FE 200-600mm tele lens, and spent about 2 hours in all to set up and capture the event. You really don't need to be out in the middle of nowhere to get a great shot of the moon.
If you've ever wanted to try photographing the Milky Way, a lunar eclipse or a full moon but didn't know where to start, this post is for you. I'll walk you through everything I do, from planning the shoot to editing the final image, and share the exact settings I used.

Planning & Timing the Shoot
The single most important thing you can do is to plan ahead.
Unlike a landscape photo, where you can more or less show up and improvise, full moon, eclipse, and astro photography in general is very time-sensitive. Each phase looks completely different, and you only get one shot at it (literally). The moon moves quite quickly, so having everything set up before it happens is a must.
Here's what I use in the lead-up to any (big lunar or astro event:
PhotoPills is my absolute go-to app for planning any astro shoot. It shows you exactly where the sun/moon/Milky Way will rise and set, what phase it will be in and at what time, and you can even use the AR feature to visualise it in your actual environment before you go out. It is not a free app, but definitely worth it if you’re trying to get into astro photography. (Make sure to look up some YouTube tutorials on how to best use it to get the most out of it, as it might seem confusing when you first open it.)
Time and Date (timeanddate.com) is great for looking up the exact times of each eclipse phase (penumbral, partial, totality) for your specific location
Multiple weather apps for weather and cloud cover forecasting, especially useful when you're trying to decide whether to stay home or drive somewhere with clearer skies
NASA's Skywatching page is worth bookmarking for upcoming event dates well in advance
Gear I Use for Moon/Astro Photography
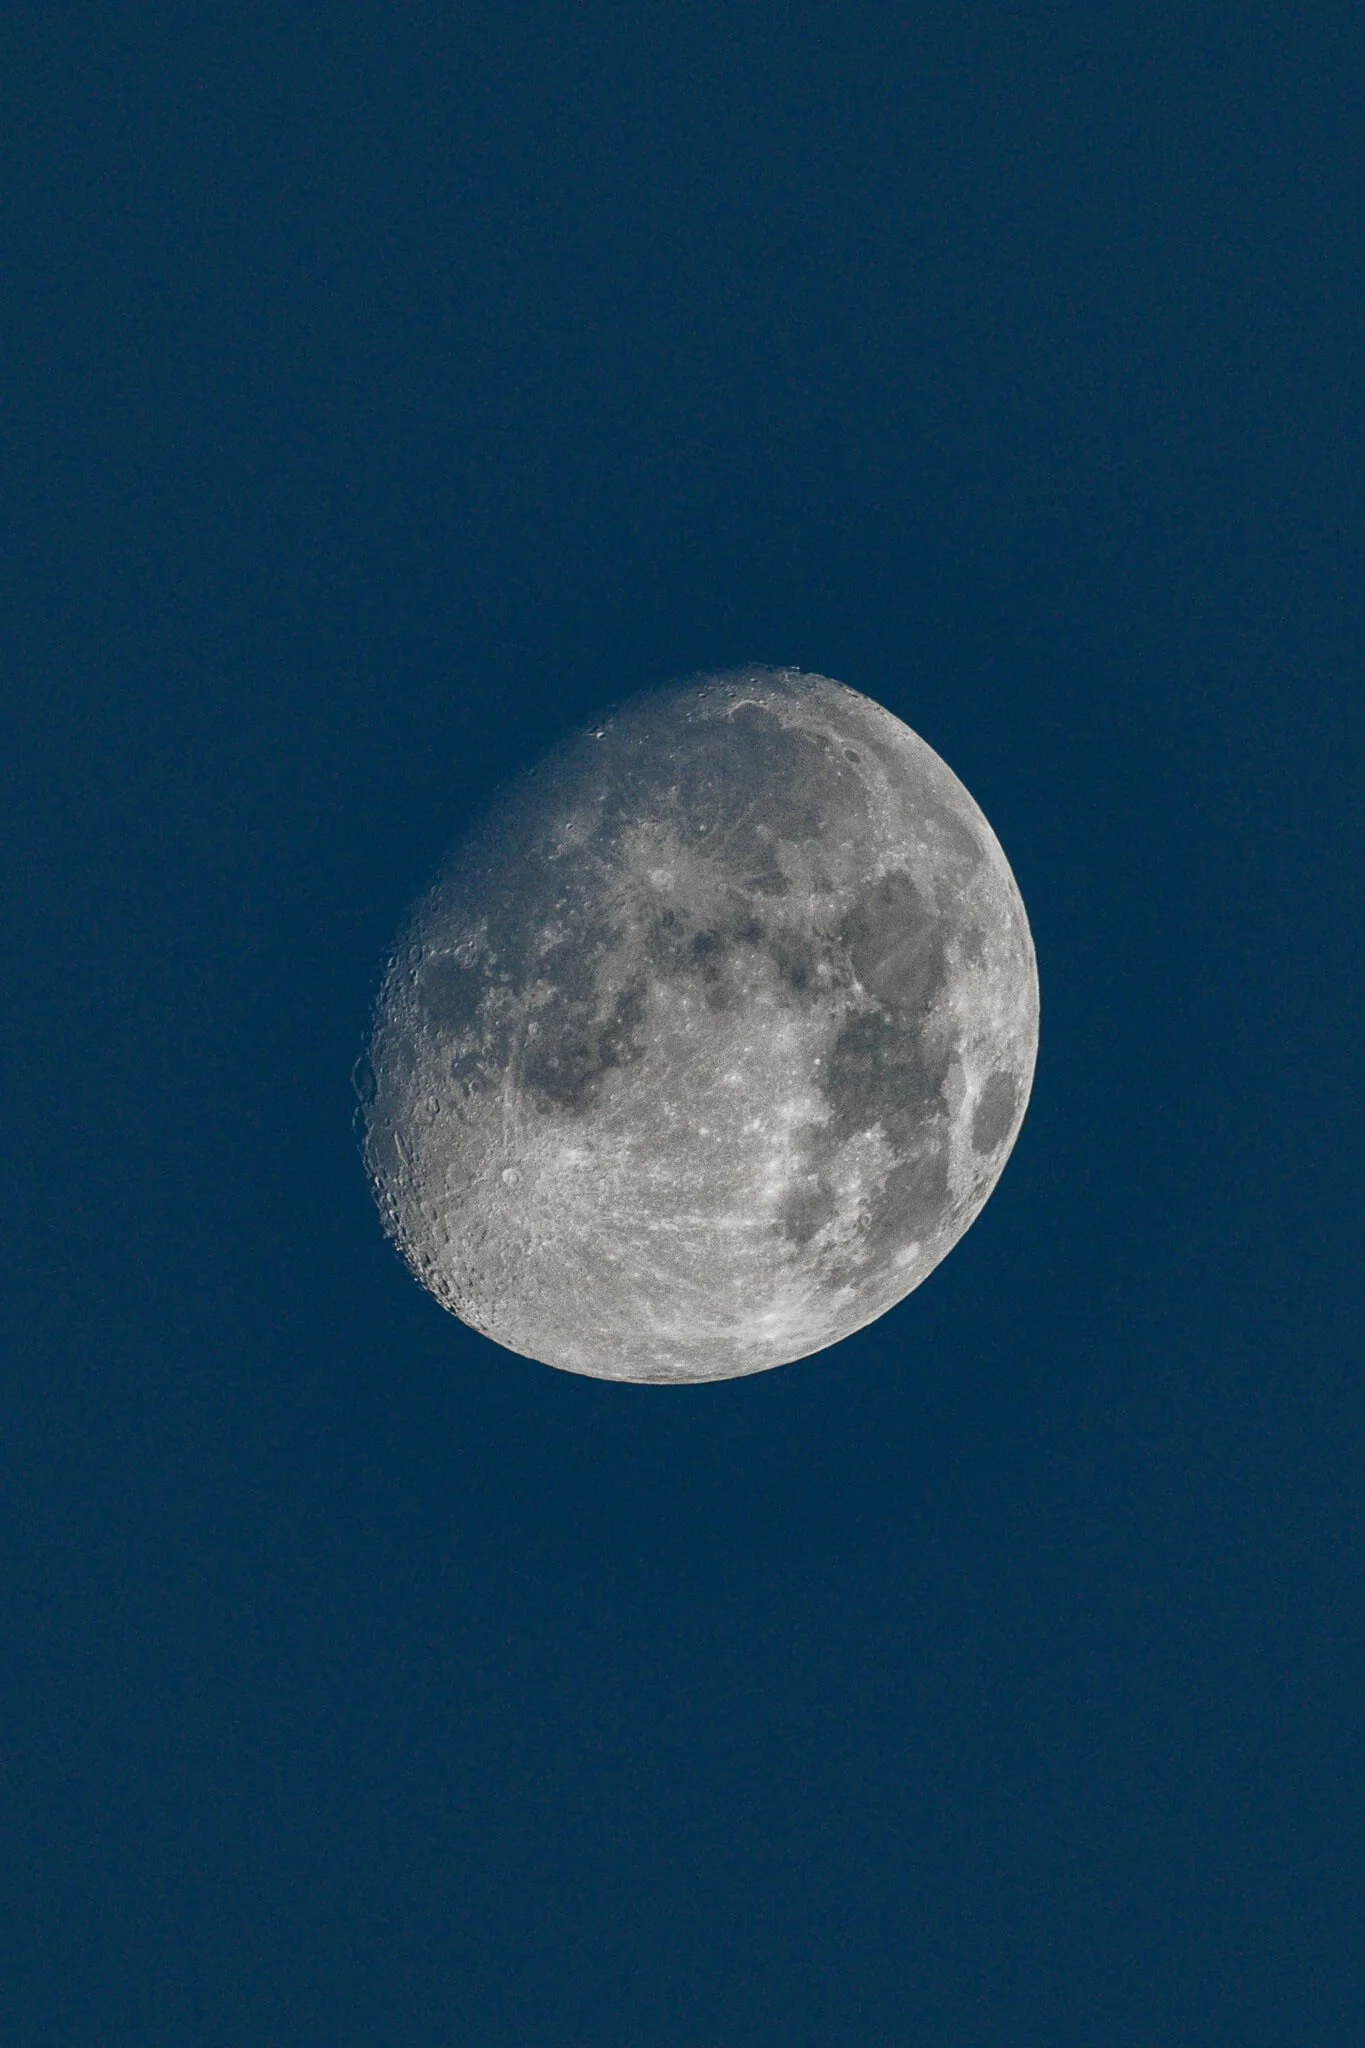
You don't need the most expensive kit to photograph the moon, but a telephoto lens (200mm and above) really does make a big difference if you want to capture surface detail.
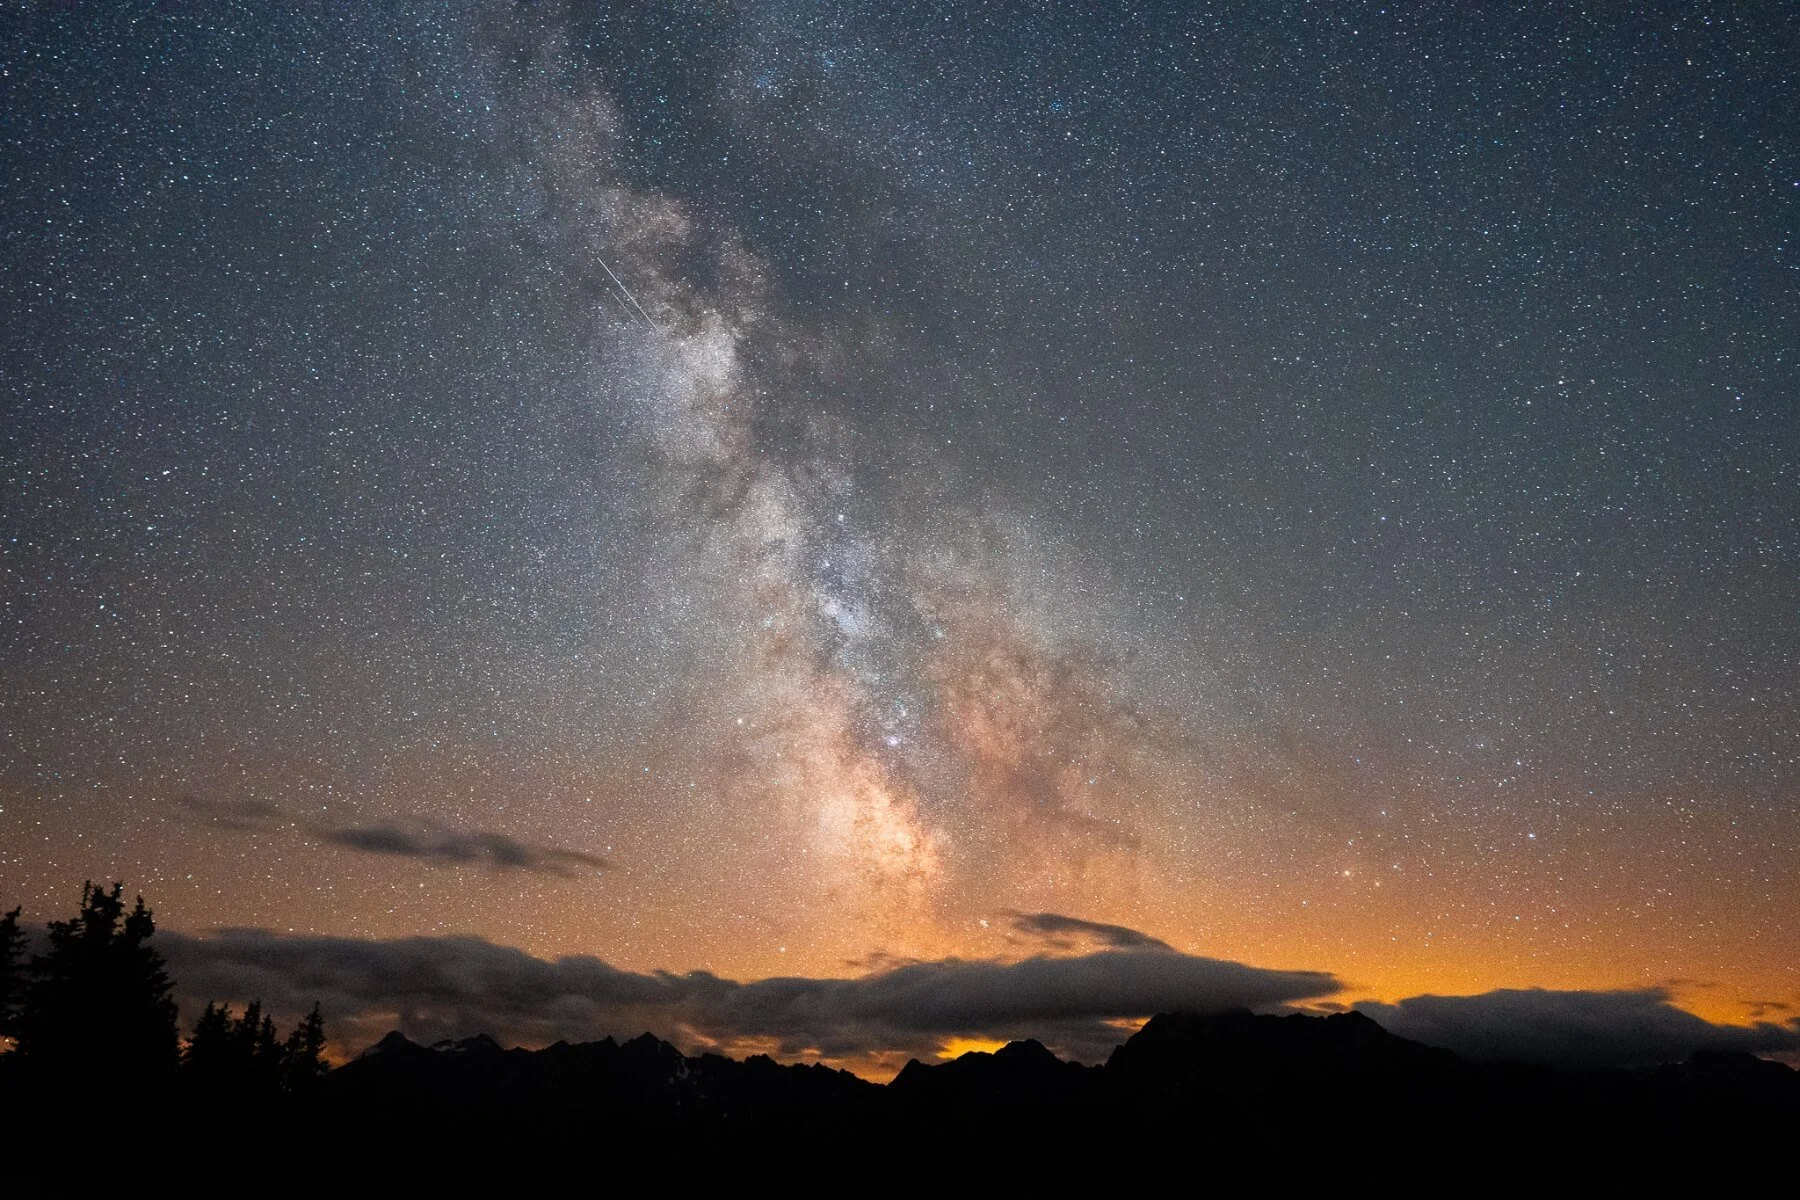
For general astro photography and shots of the Milky Way, a wide angle lense is what you want to capture as much of the sky as possible.
Here's what I shoot with:
Sony a7III is a full-frame mirrorless camera and is great for low-light shooting thanks to its sensor performance at higher ISOs
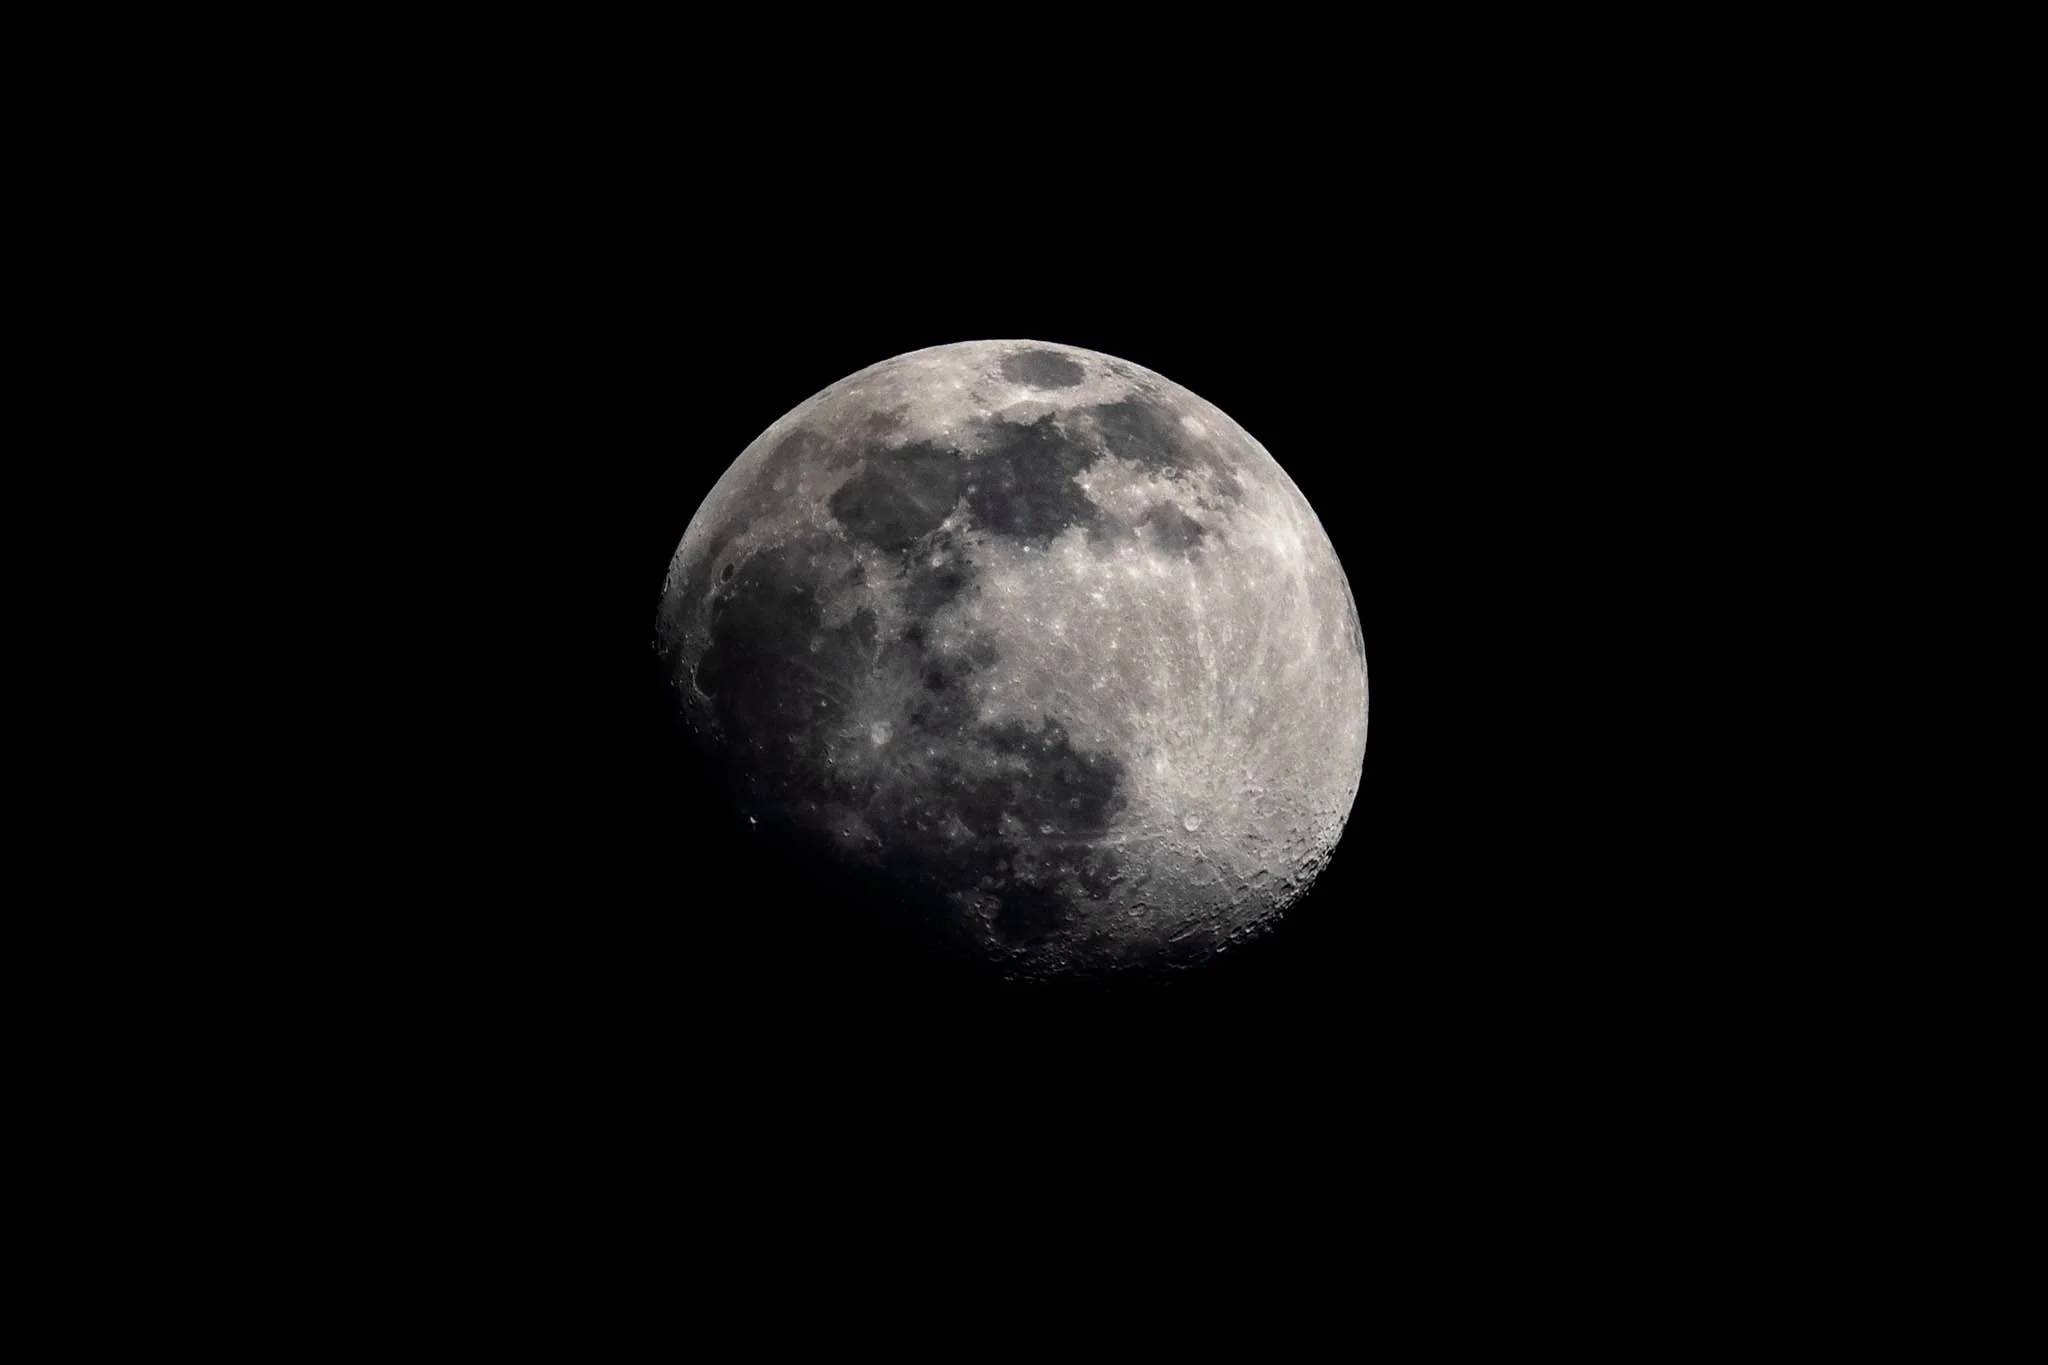
Sony FE 200-600mm f/5.6-6.3 G OSS is my go-to for getting close to the moon. At 600mm on a full-frame sensor, you can fill a good portion of the frame with the moon and actually see craters. The built-in optical stabilisation (OSS) is also a lifesaver when shooting handheld or in windy conditions
Sony FE 24mm f/1.4 G Master is what I reach for on wider astro shots like the Milky Way or shots that include a landscape. The f/1.4 aperture lets in so much light, and it is tack sharp even wide open
A sturdy tripod is non-negotiable. At 600mm or when you’re doing long exposure captures, even the slightest movement will ruin your shot.
Remote shutter release or 2-second timer to avoid any camera shake from pressing the shutter button, I either set a 2-second timer or connect the camera with my photo to remotely release the shutter. Again, even the slightest movement can ruin your shot.
Extra batteries because cold nights drain them faster. I always like to be prepared and bring extra batteries
If you don't have a 200-600mm, don't stress. Even a 70-200mm lens will give you a lovely shot of the moon, especially during the full blood moon phase when it is large and vivid. You can also use a 2x teleconverter if your lens supports it.
Camera Settings for a Lunar Eclipse & Astro Shots
This is where it gets a little tricky, because astro photography does not have a one-size-fits-all setting. What works for a Milky Way shot at 24mm will completely ruin a moon photo at 600mm, and a lunar eclipse throws in an extra layer of complexity because the brightness changes dramatically as the eclipse progresses. Let me break it all down.
The Most Important Rule: How Long Can Your Shutter Stay Open?
This is the first thing any beginner needs to understand before shooting the night sky. The Earth is constantly rotating, and even though we can't feel it, your camera absolutely can. Leave the shutter open too long, and your stars will blur into little streaks rather than sharp pinpoints of light. The longer your focal length, the faster that blur appears.
There are two rules photographers use to figure out the maximum shutter speed before star trails kick in.
The 500 Rule is the simpler of the two and a great starting point. You divide 500 by your focal length to get your maximum shutter speed in seconds. So on a 24mm lens, you can expose for up to about 20 seconds (500 / 24) before star trails appear. On a 50mm, around 10 seconds. On a 200mm, only 2-3 seconds. It is a rough guide, but it works well enough for most situations and is easy to calculate in your head out in the field. This is what I usually go by.
The NPF Rule is more precise and gives you a longer, more accurate exposure time. It takes into account your aperture, sensor pixel density and the declination of the stars you're shooting. It is a more complex formula, but PhotoPills actually calculates it for you automatically, which is one more reason it is such a great app to have on hand.
For the moon specifically, these rules don't fully apply because the moon is so bright and moves even faster across the sky than the stars do.
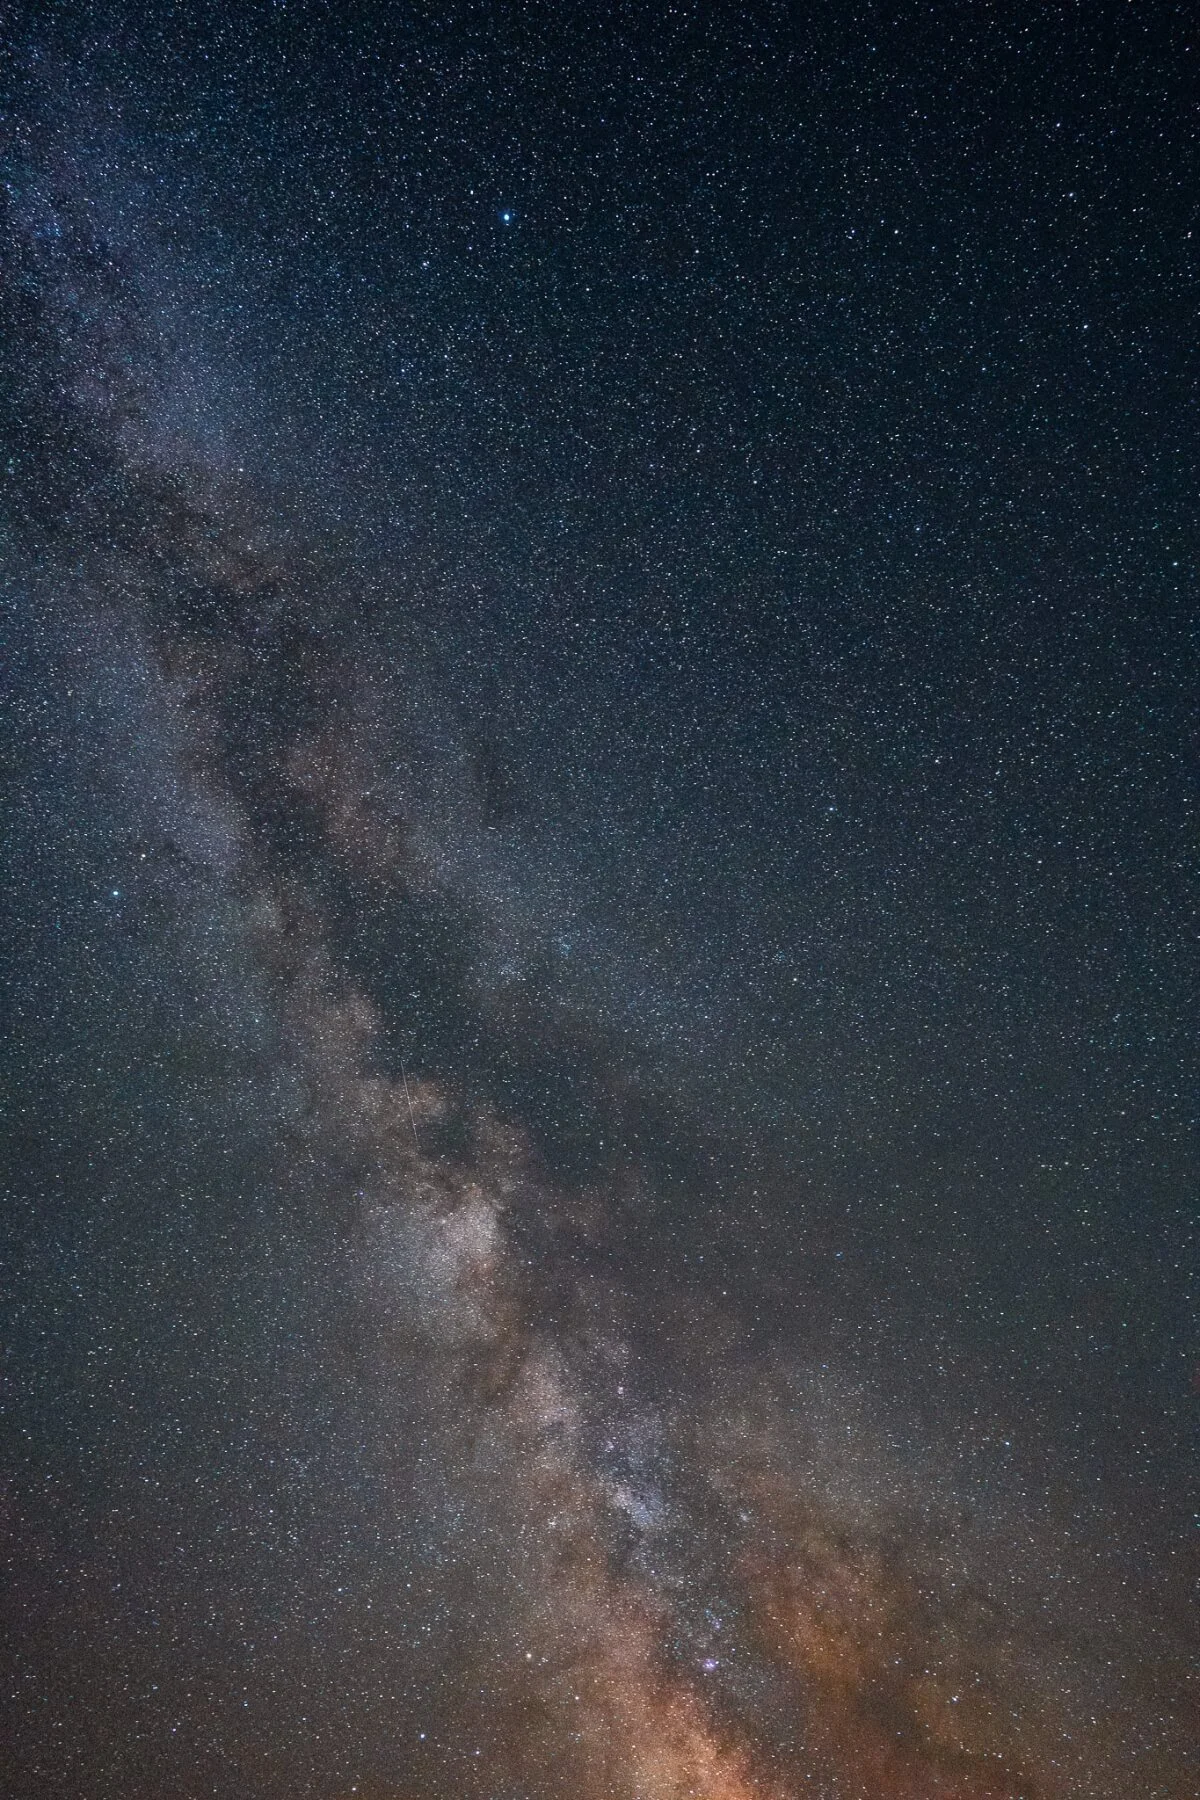
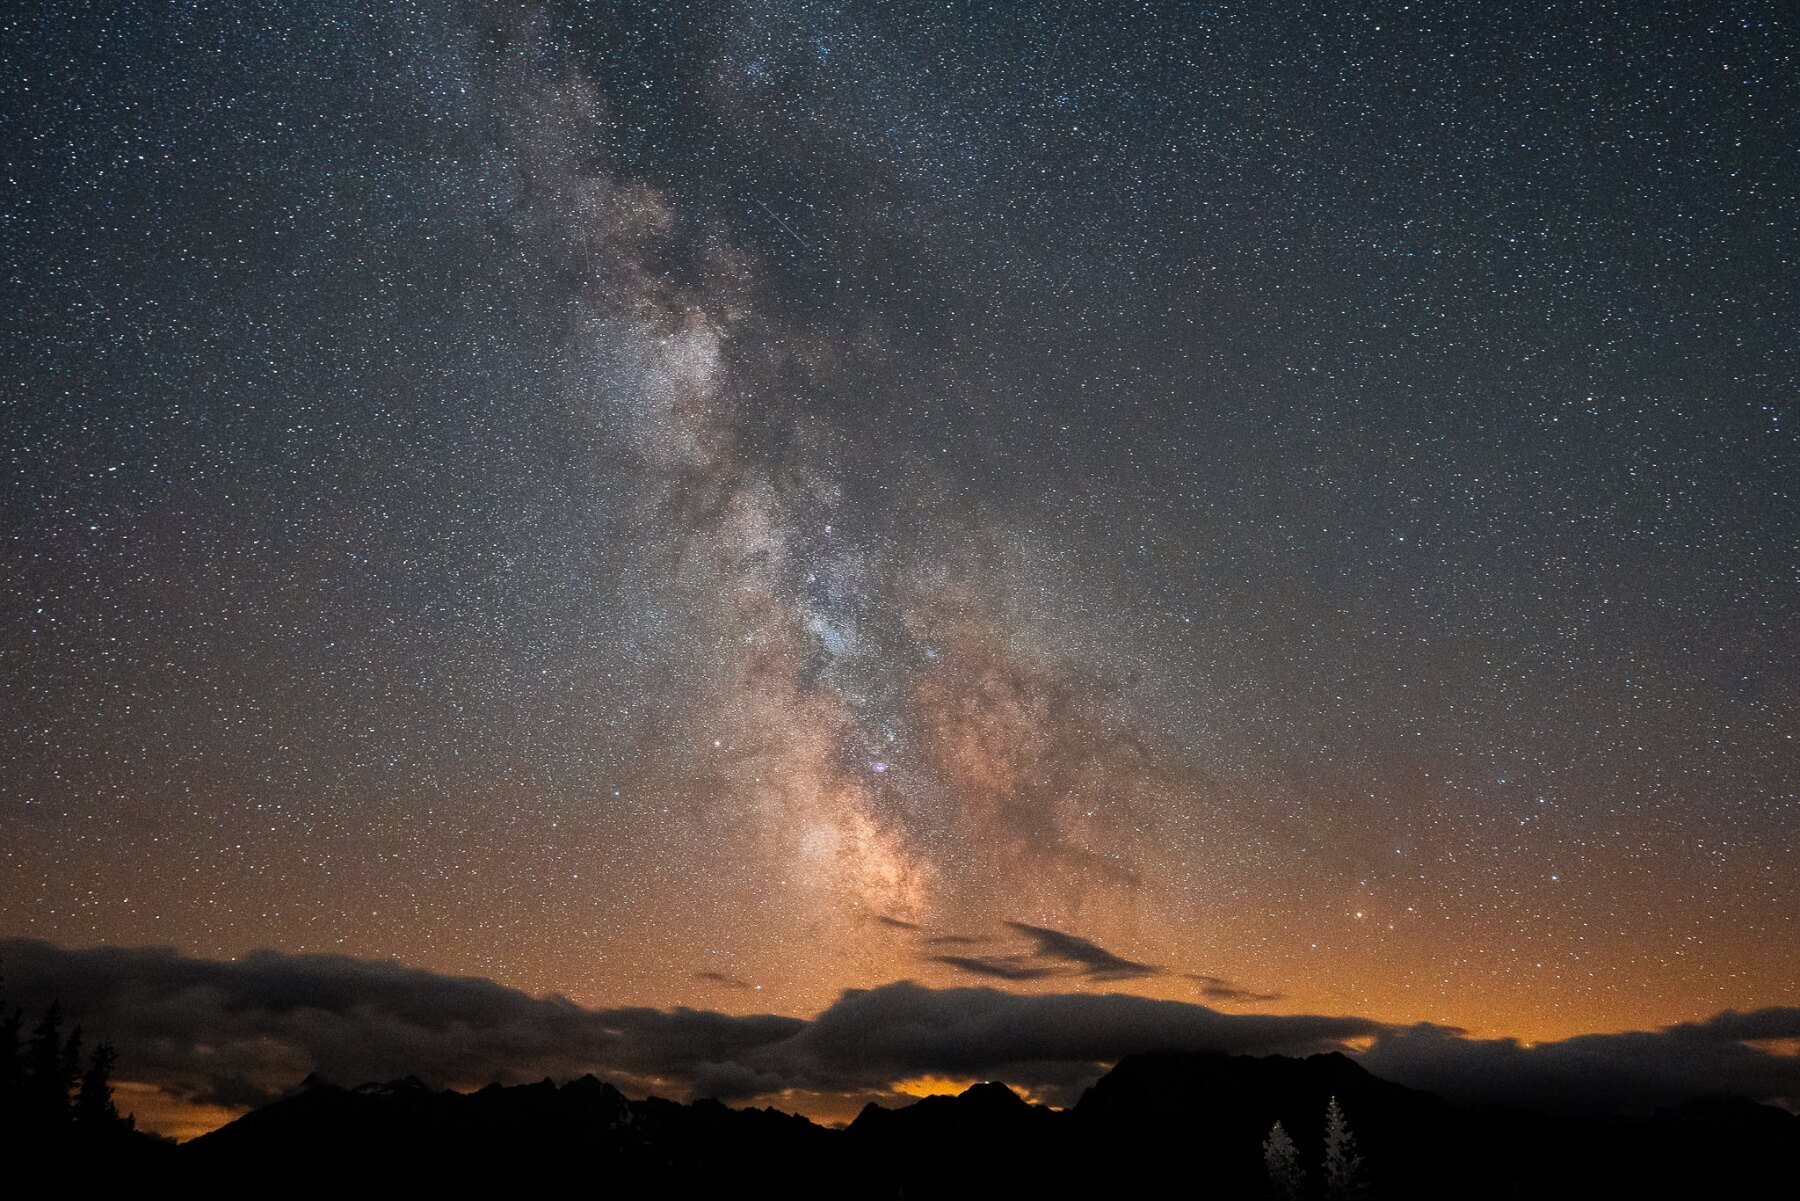
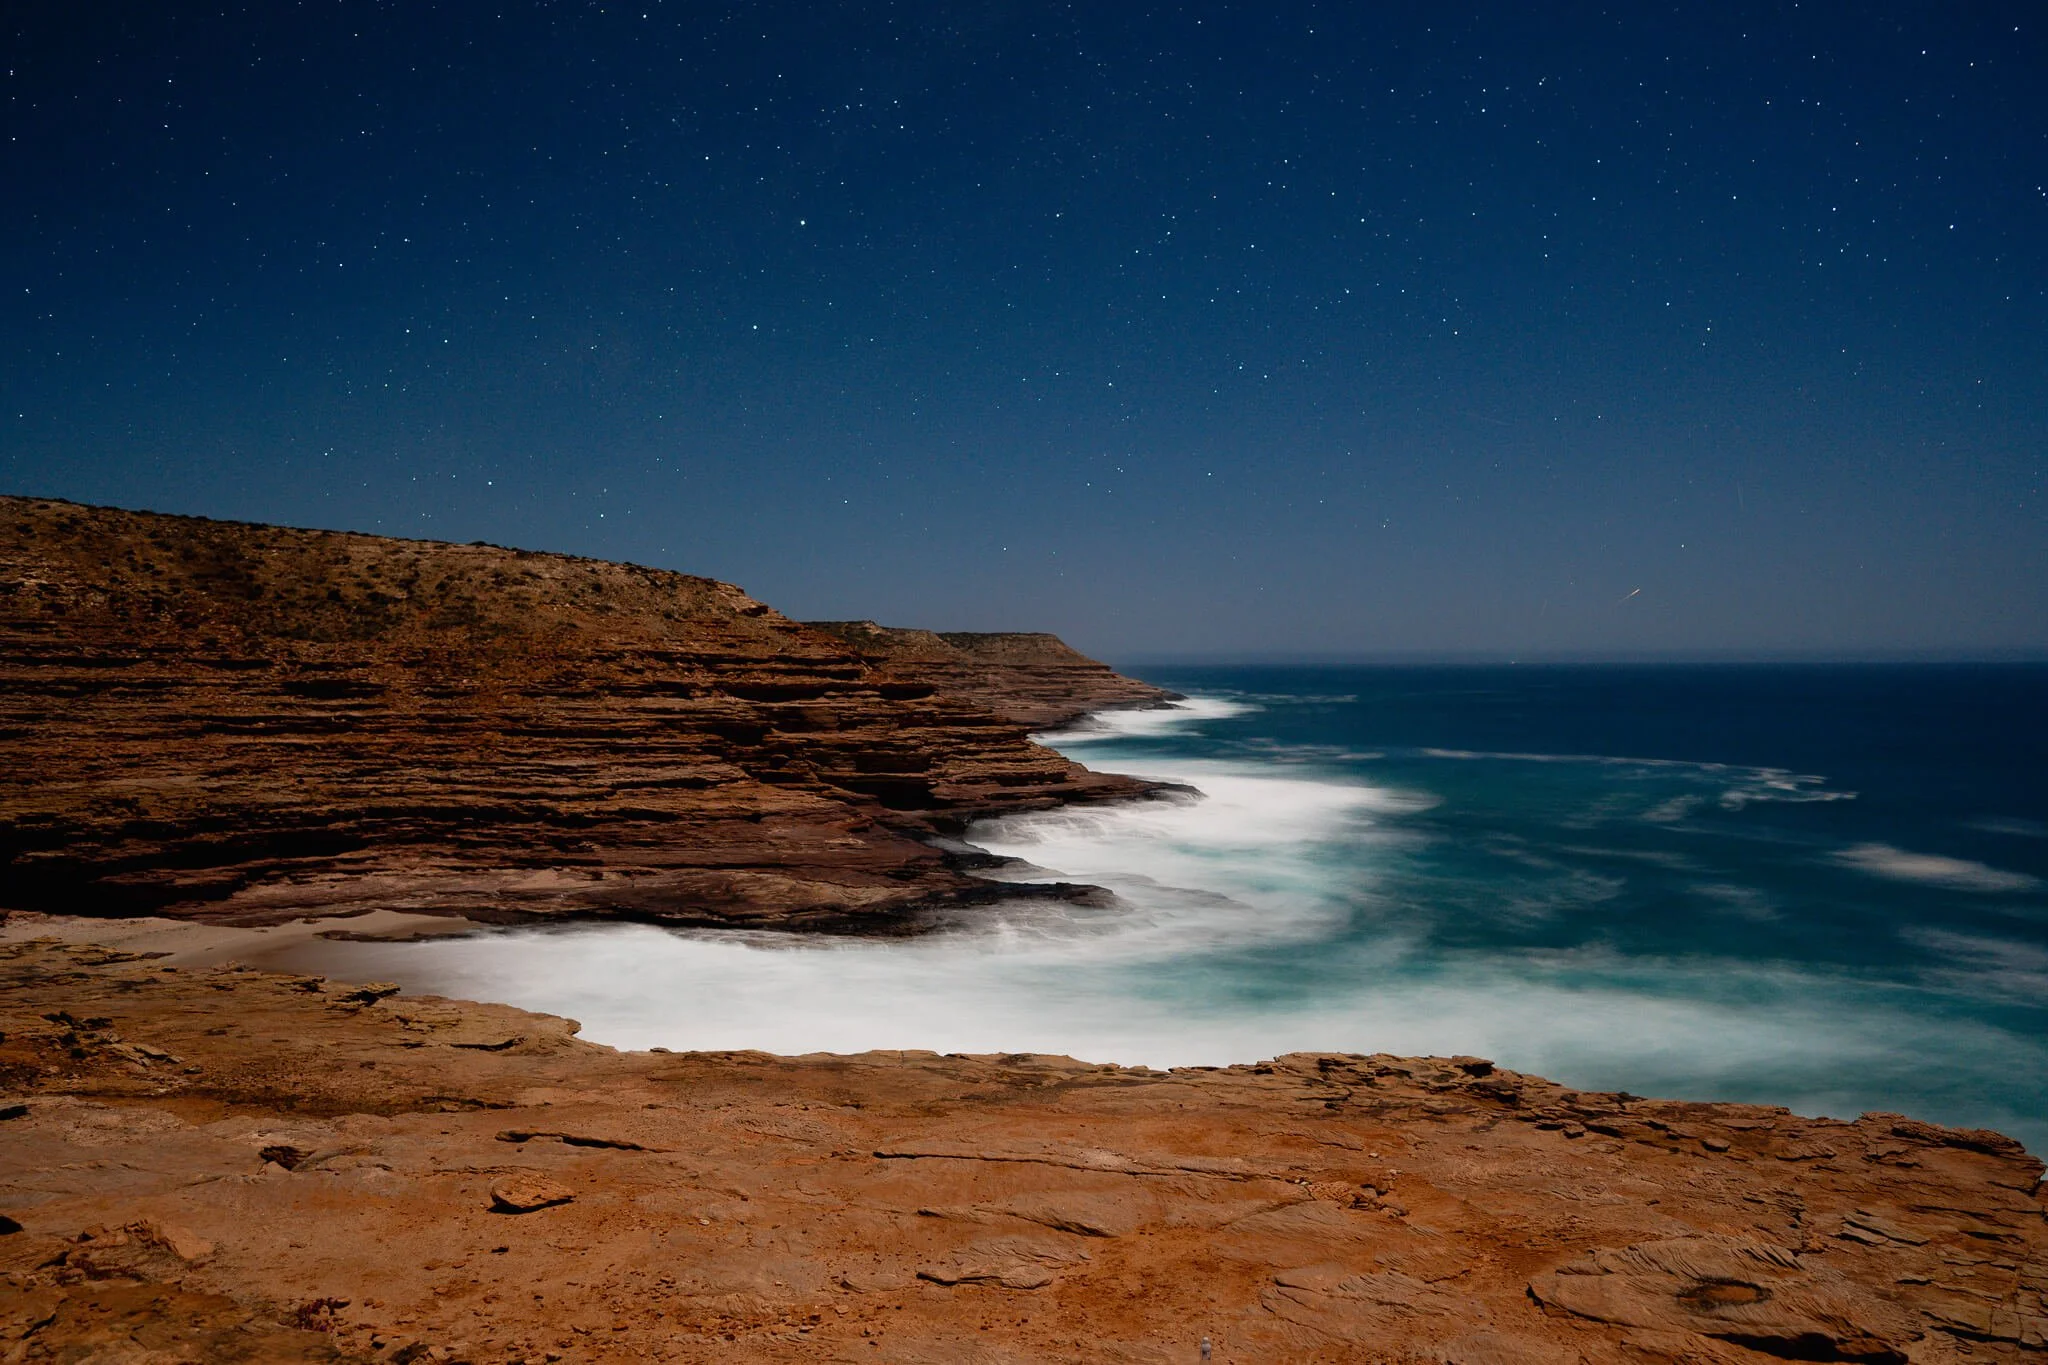
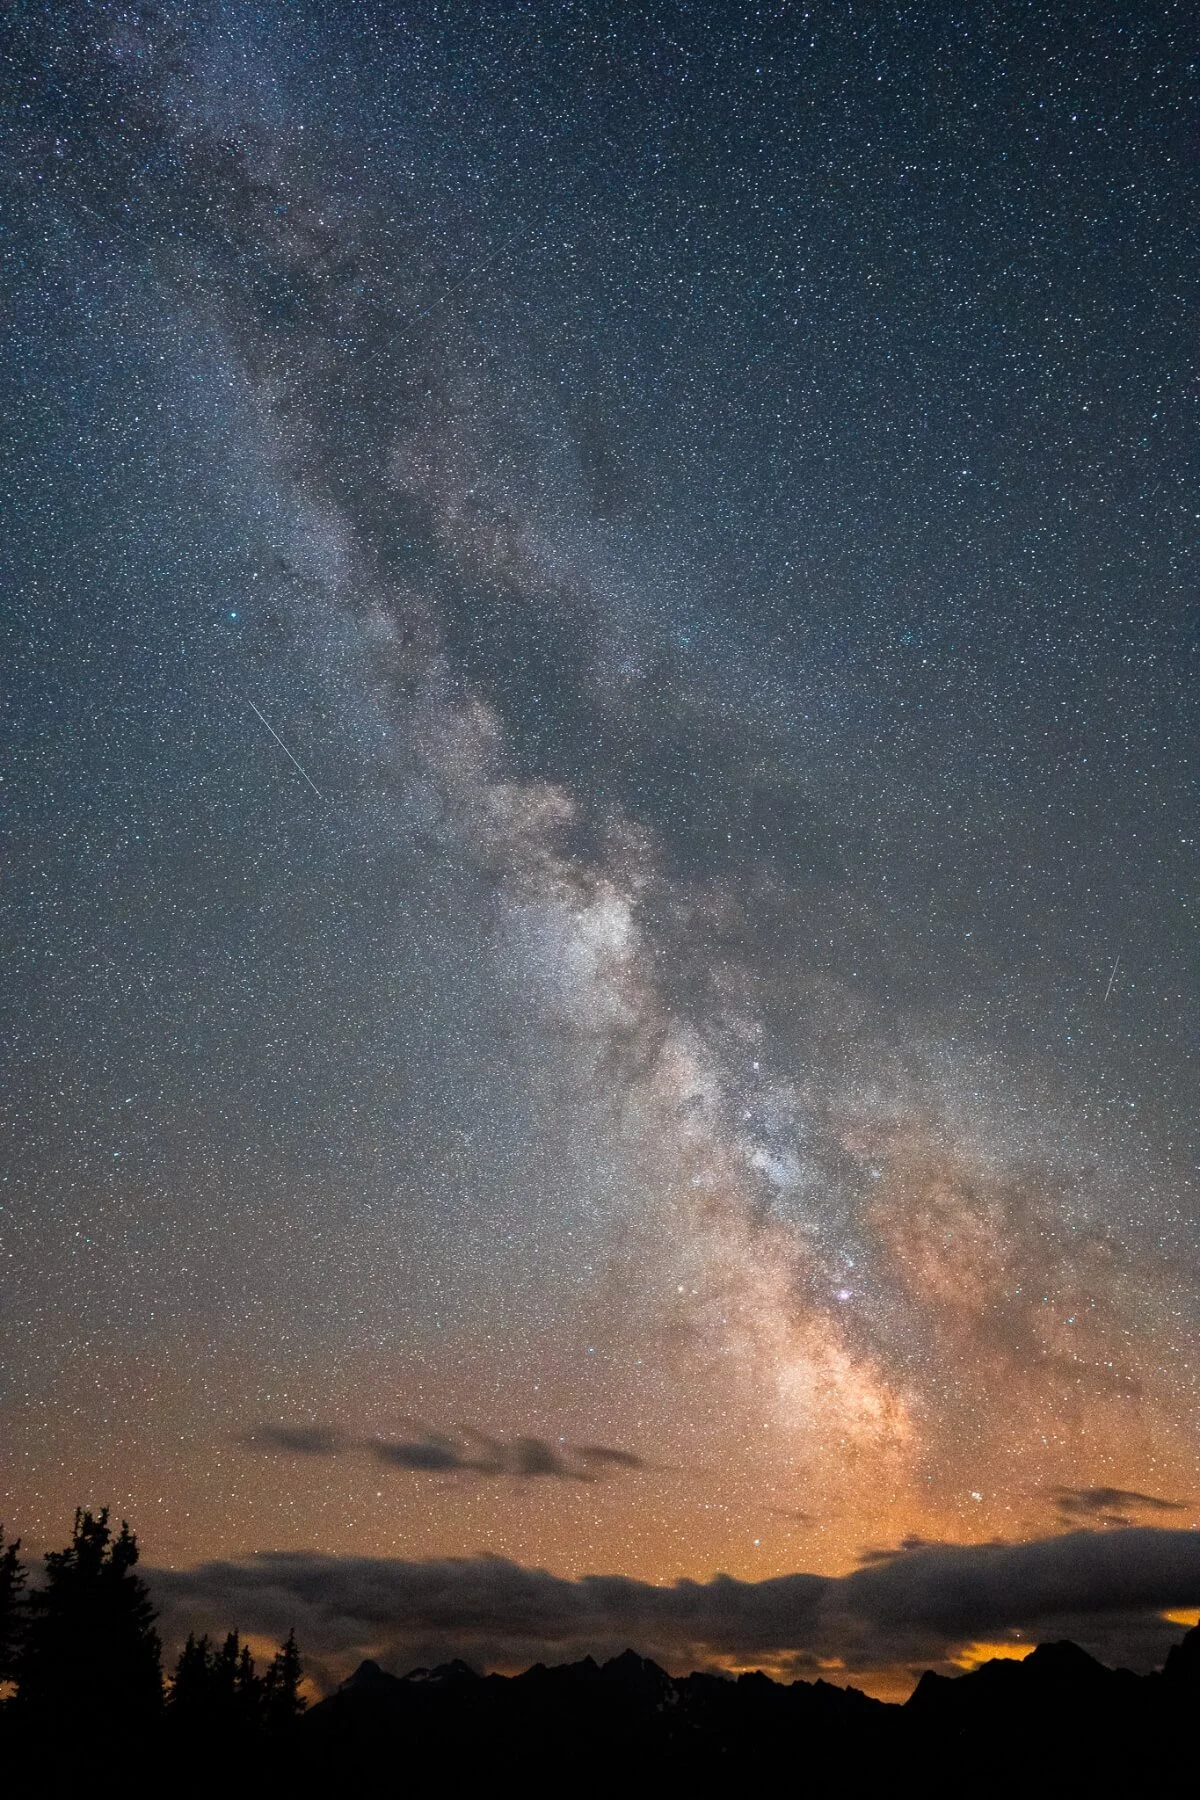
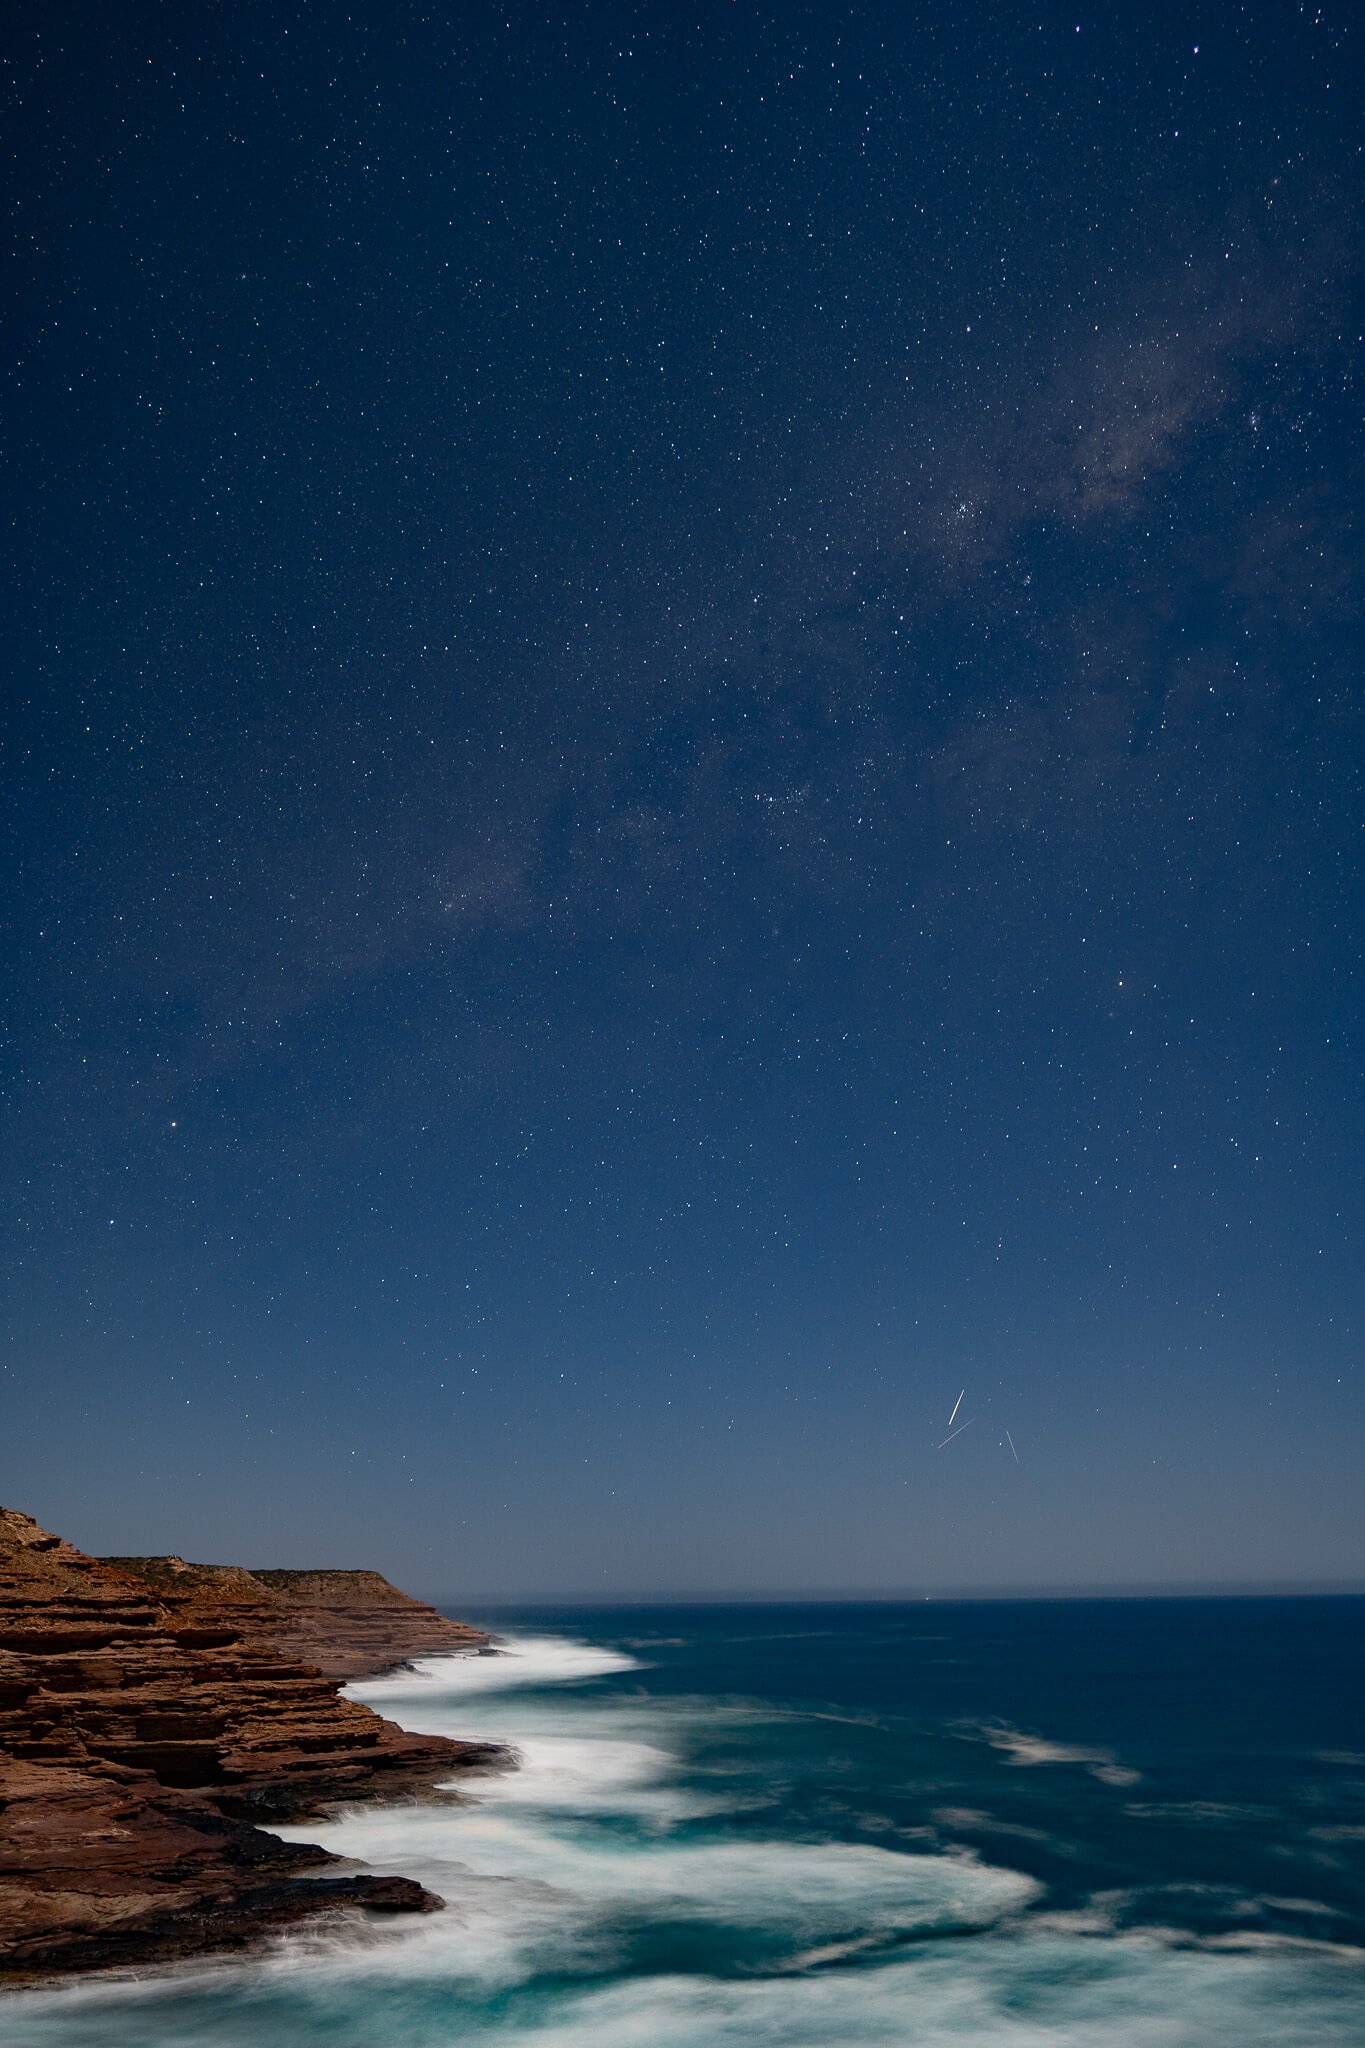
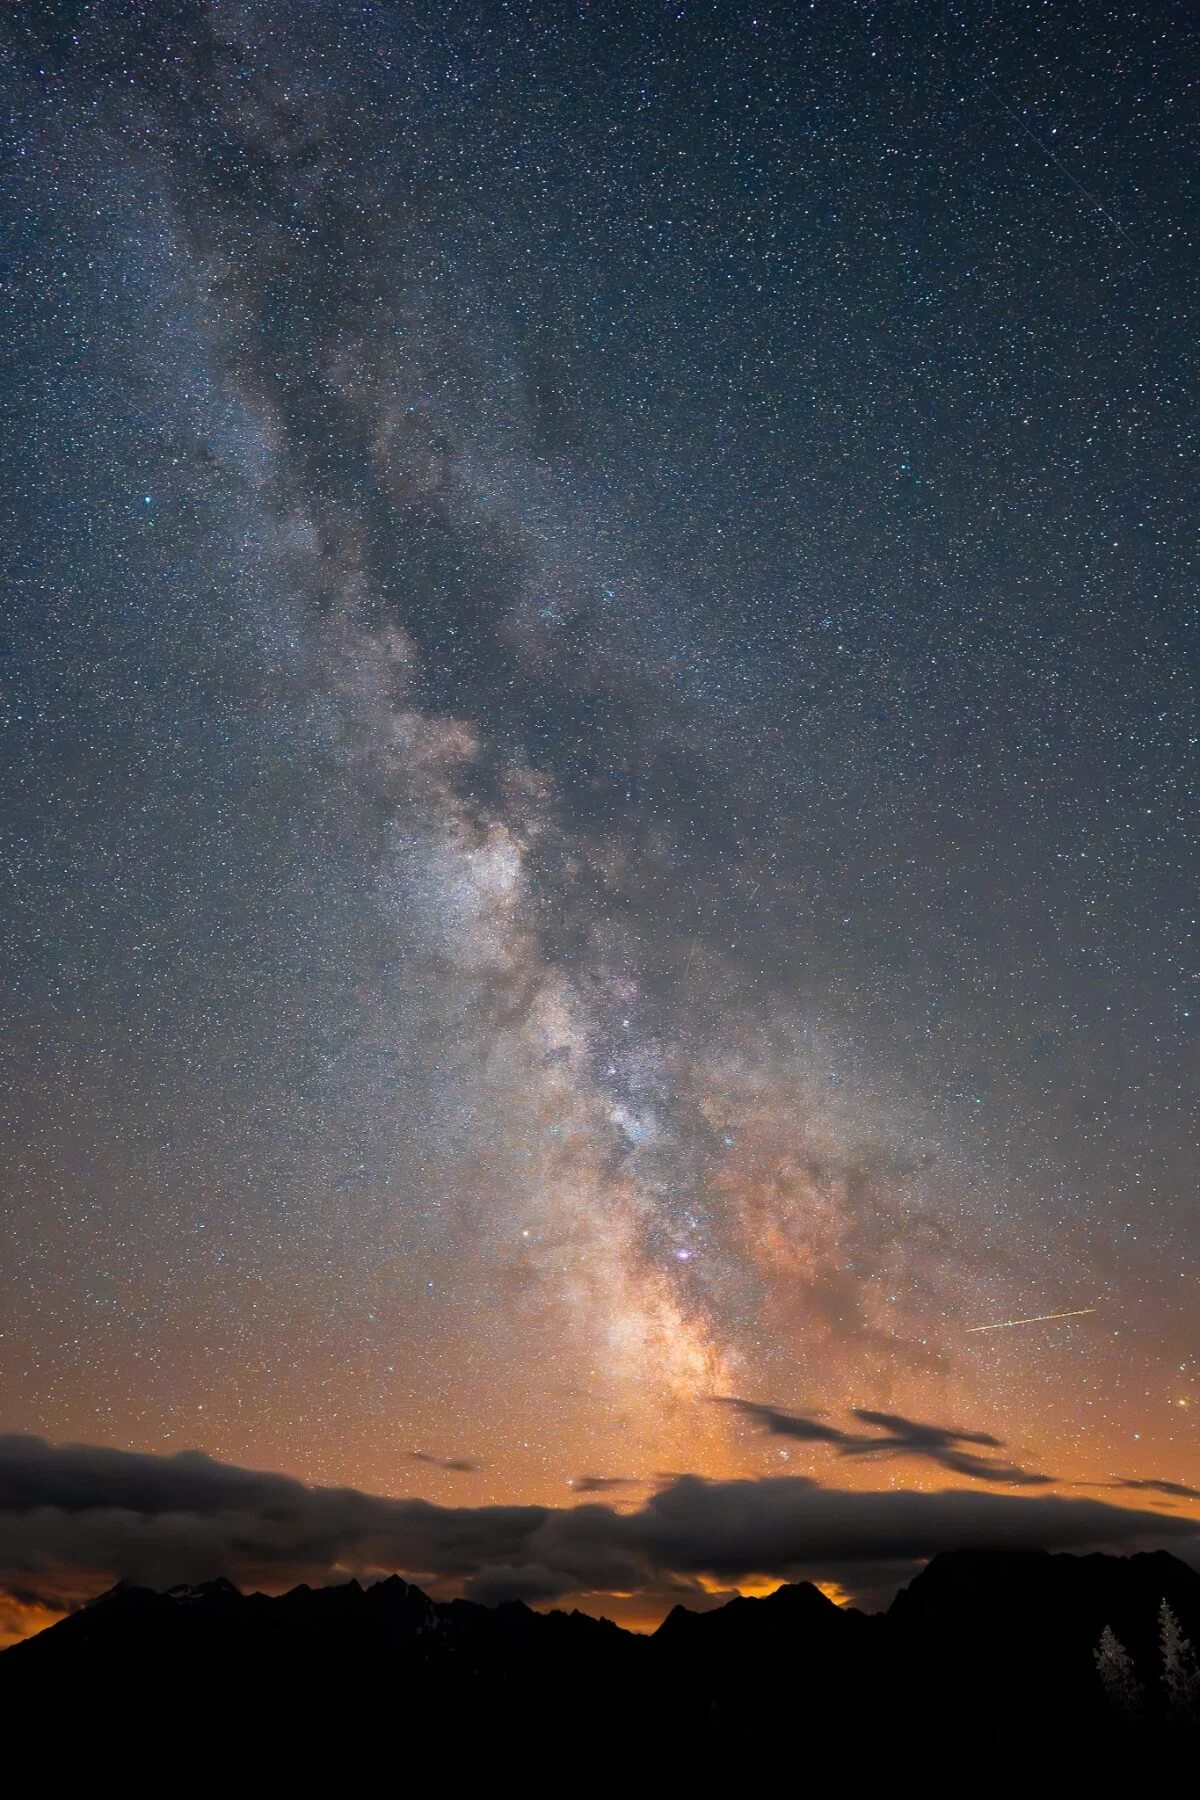
Milky Way and Wide Angle Astro Shots
This is where my Sony 24mm f/1.4 G Master really earns its place in my bag. When you want to capture the full sweep of the Milky Way or include a landscape in the foreground, you need a wide, fast lens and a dark sky.
ISO 1600-6400, depending on how dark your sky is and how much noise your sensor can handle. Generally, the lower the ISO, the better to reduce noise.
Aperture f/1.4 to f/2.8, as wide open as your lens will go. Every extra stop of light makes a huge difference out here
Shutter speed 15-25 seconds on a 24mm lens using the 500 Rule as a guide
Focus to infinity, but don't just trust the infinity mark on your lens, as it is not always accurate. Zoom into a bright star on your live view and adjust manually until it is a sharp pinpoint
A good starting point for Milky Way shooting is ISO 3200, f/2.0 and 20 seconds. From there, you adjust based on what your histogram and preview look like.
Lunar Eclipse Settings
A lunar eclipse requires very different settings across its different phases. During a full moon, the moon is incredibly bright, almost like shooting a subject in daylight. But during totality, when the moon is in Earth's shadow, it becomes much, much darker, and you need to compensate significantly.
Here's a rough guide to what worked for me at 600mm:
Partial eclipse phases (before and after totality):
ISO 100-400
Aperture f/6.3 (wide open on the 200-600mm)
Shutter speed 1/500 to 1/1000s
The moon is still very bright at this point. If in doubt, underexpose slightly, as you can always recover highlights in post
During totality (the blood moon):
ISO 800-3200
Aperture f/6.3
Shutter speed 1/15 to 1/60s
The moon drops dramatically in brightness during totality, so you will need to slow right down and bump up that ISO
Be careful not to go too slow, though. Even at 1/15s and 600mm, you will start to see motion blur from the moon moving across the sky, so keep zooming in on your preview to check sharpness
General Tips for Any Astro Shoot
Shoot in RAW, always. You will thank yourself in editing later
Use manual focus and zoom into your live view to nail the focus on a bright star or the moon's edge before you start shooting
Check your histogram after every few shots and adjust as conditions change
Turn off in-body stabilisation if your camera is on a tripod, as some cameras actually perform better without it in that situation
Let your eyes adjust to the dark for at least 15 to 20 minutes before you start shooting. You'll be surprised how much more you can see once they do
Use a red light headlamp if you need to check your settings, as it preserves your night vision far better than a white torch
Post-Processing
I edit all my astro photos in Adobe Lightroom, and the beauty of shooting RAW is how much room you have to work with.
For wider Milky Way or landscape and moon shots, I'll sometimes bring in Photoshop to blend exposures (a foreground shot and a sky shot, for example), but that's a bit more complicated and would deserve its own post.
Here is my general workflow for moon / Milky Way shots:
White balance - for the blood moon specifically, I lean into the warm red tones rather than correcting them. A slightly cooler white balance can actually make the red pop even more against the night sky
Exposure and highlights - pull the highlights down if the bright limb of the moon is blown out, and bring up shadows to reveal crater detail
Clarity and texture - these two sliders are your best friends for lunar surface detail. Bump them up moderately, and you will be amazed at what comes through
Dehaze - another favourite to get a few more details and contrast, but be careful, as noise will pick up as well
Noise reduction - even at ISO 1600, you'll likely have some noise. Lightroom's AI Denoise feature is excellent, and I use it on almost every astro shot
Crop - don't be afraid to crop in tighter to really show off the surface detail, especially if you are shooting at 600mm on a full-frame body
Upcoming Lunar and Astro Events to Practice On
You really don't have to wait for a rare blood moon to practise your astro photography! Any night with clear skies and low light pollution is a perfect starting point.
I also like to take moon photos just before sunset / after sunrise, when the sky is not pitch black.
Here are some great opportunities to get out and shoot:
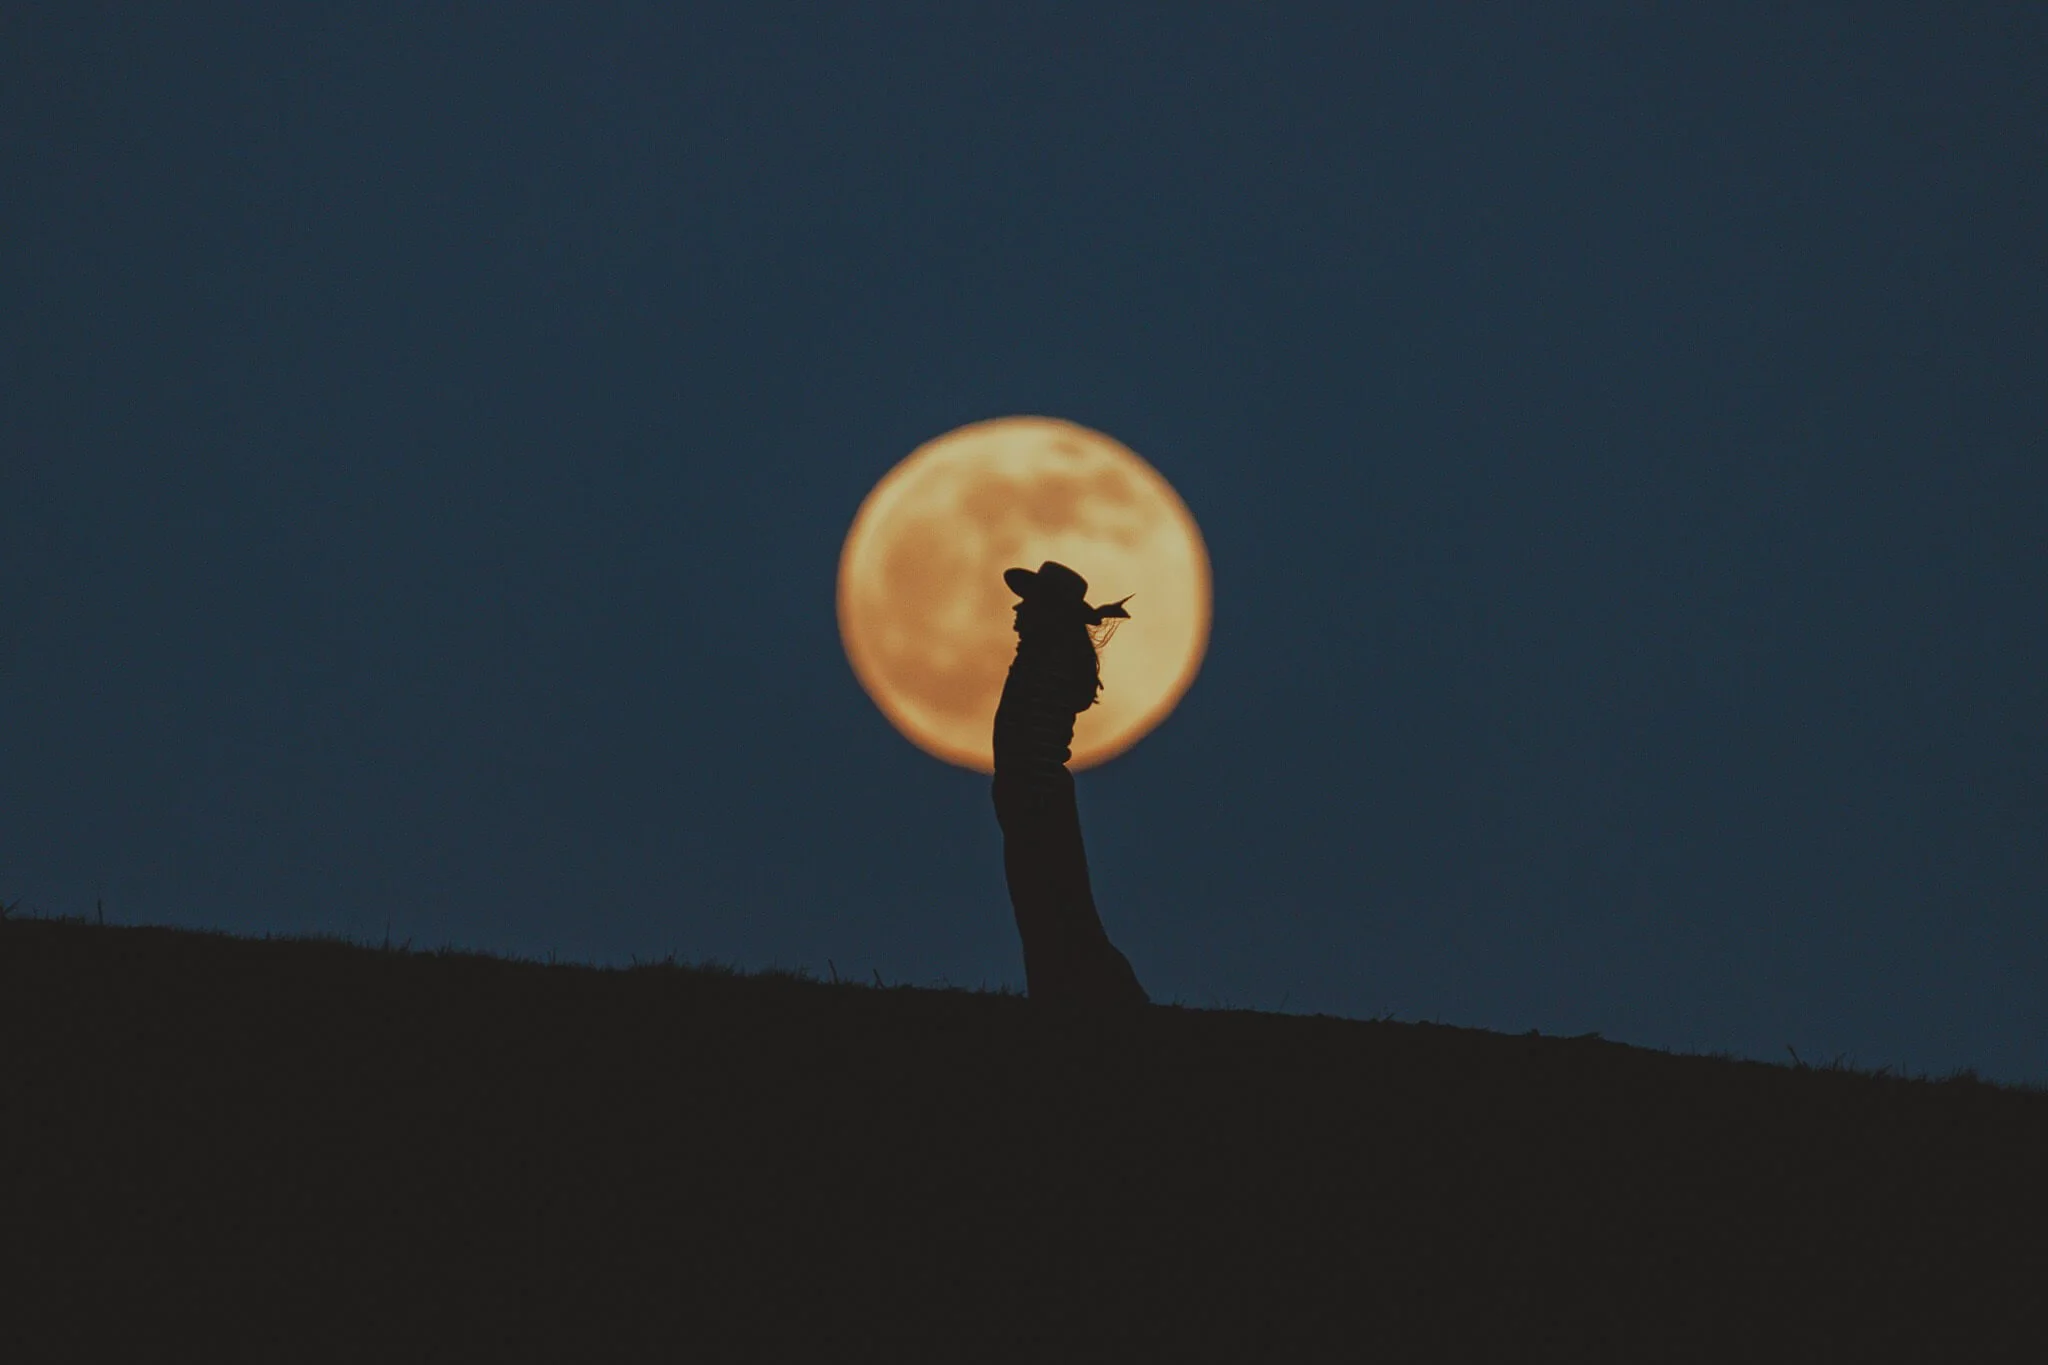
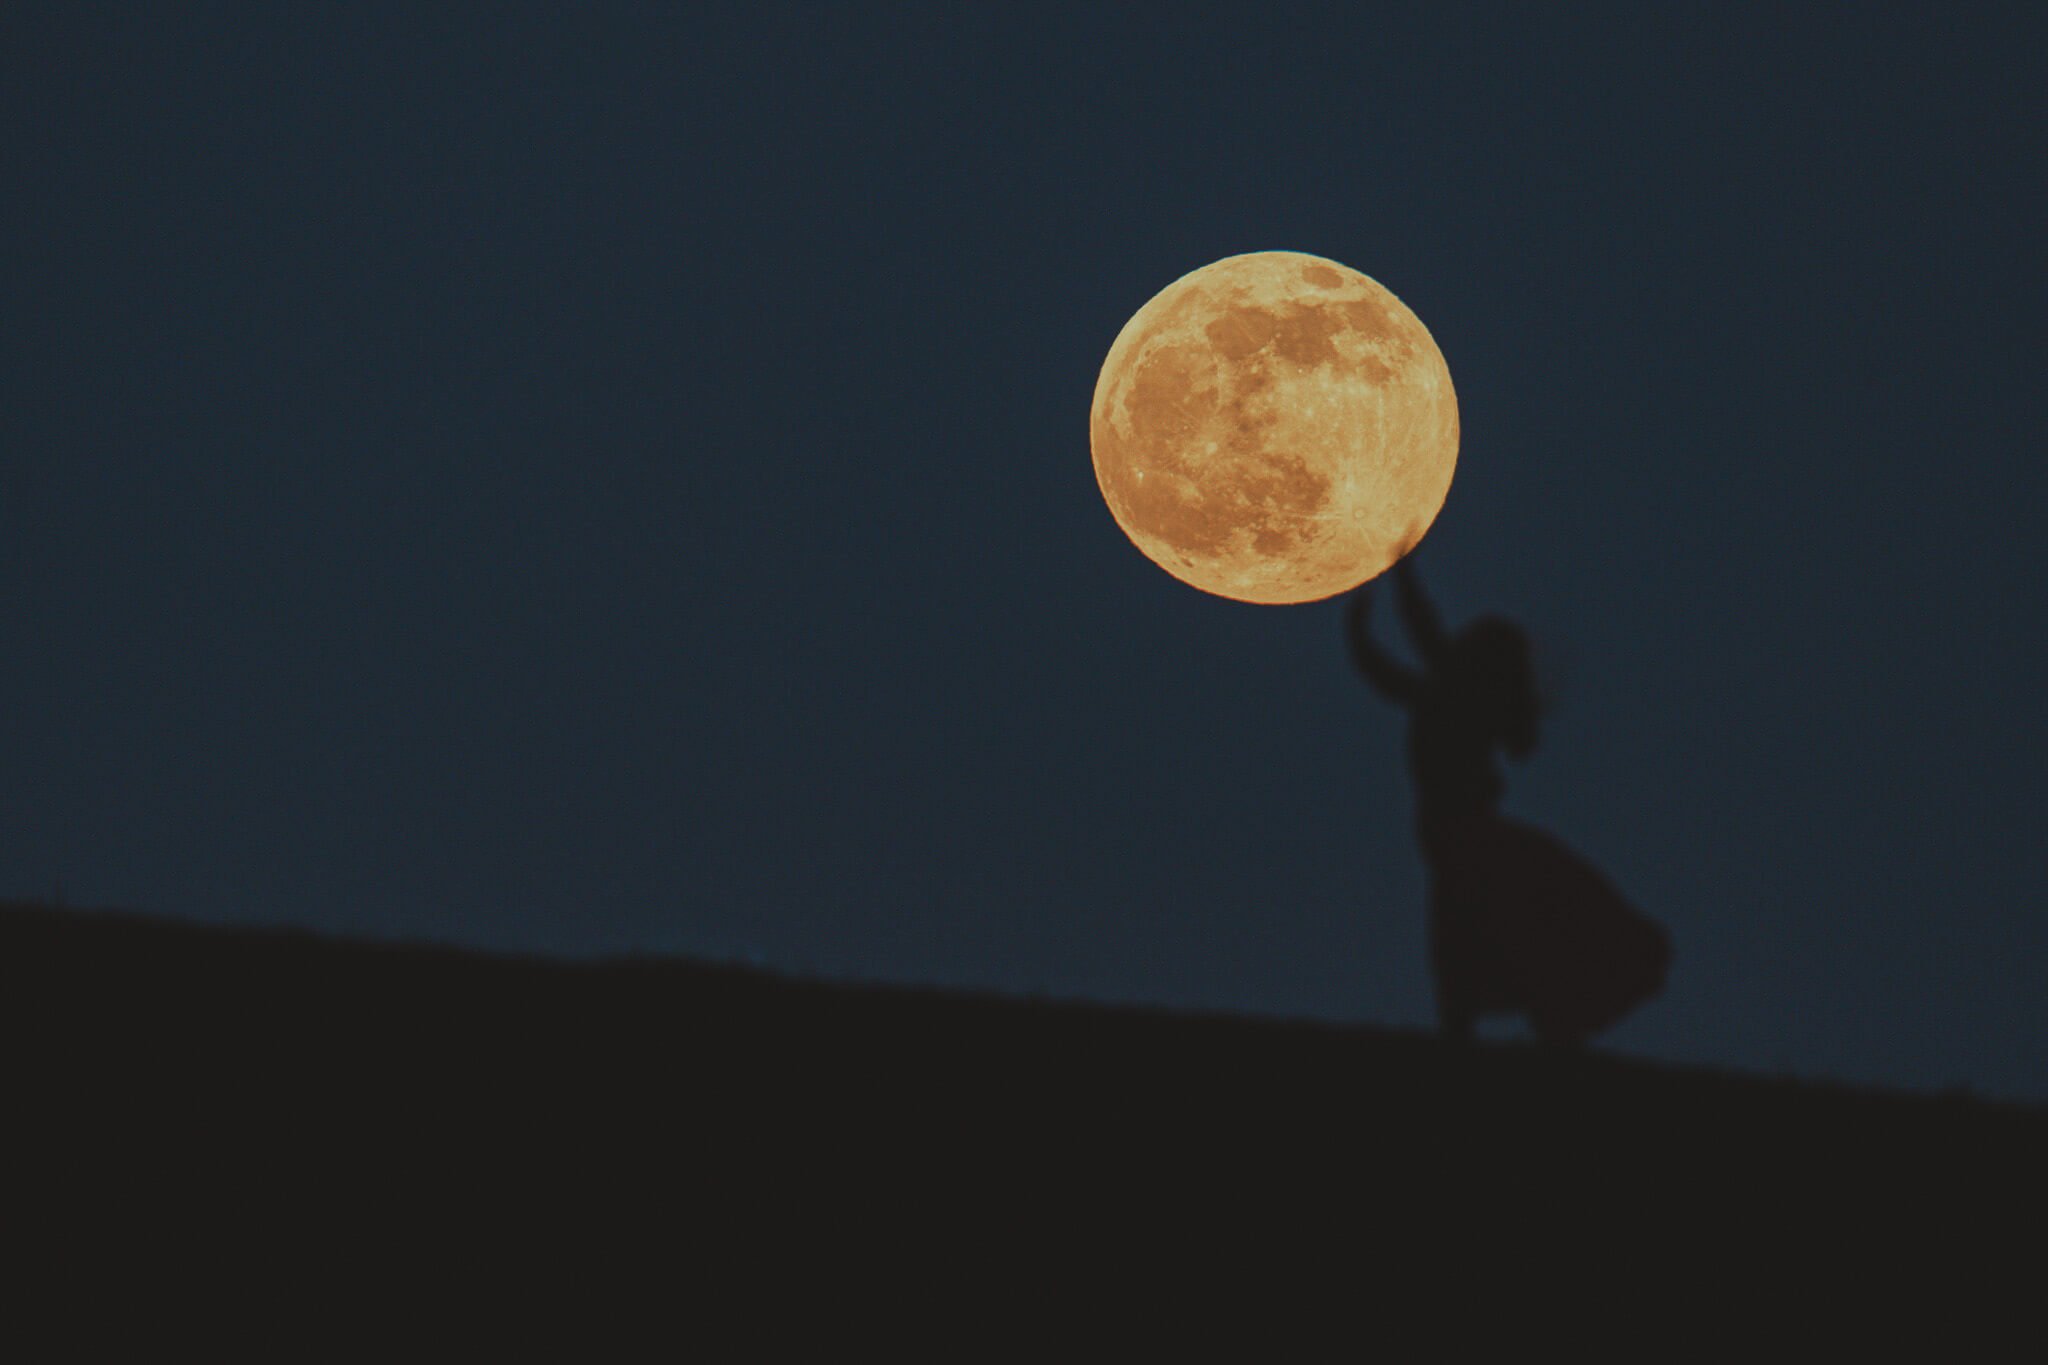
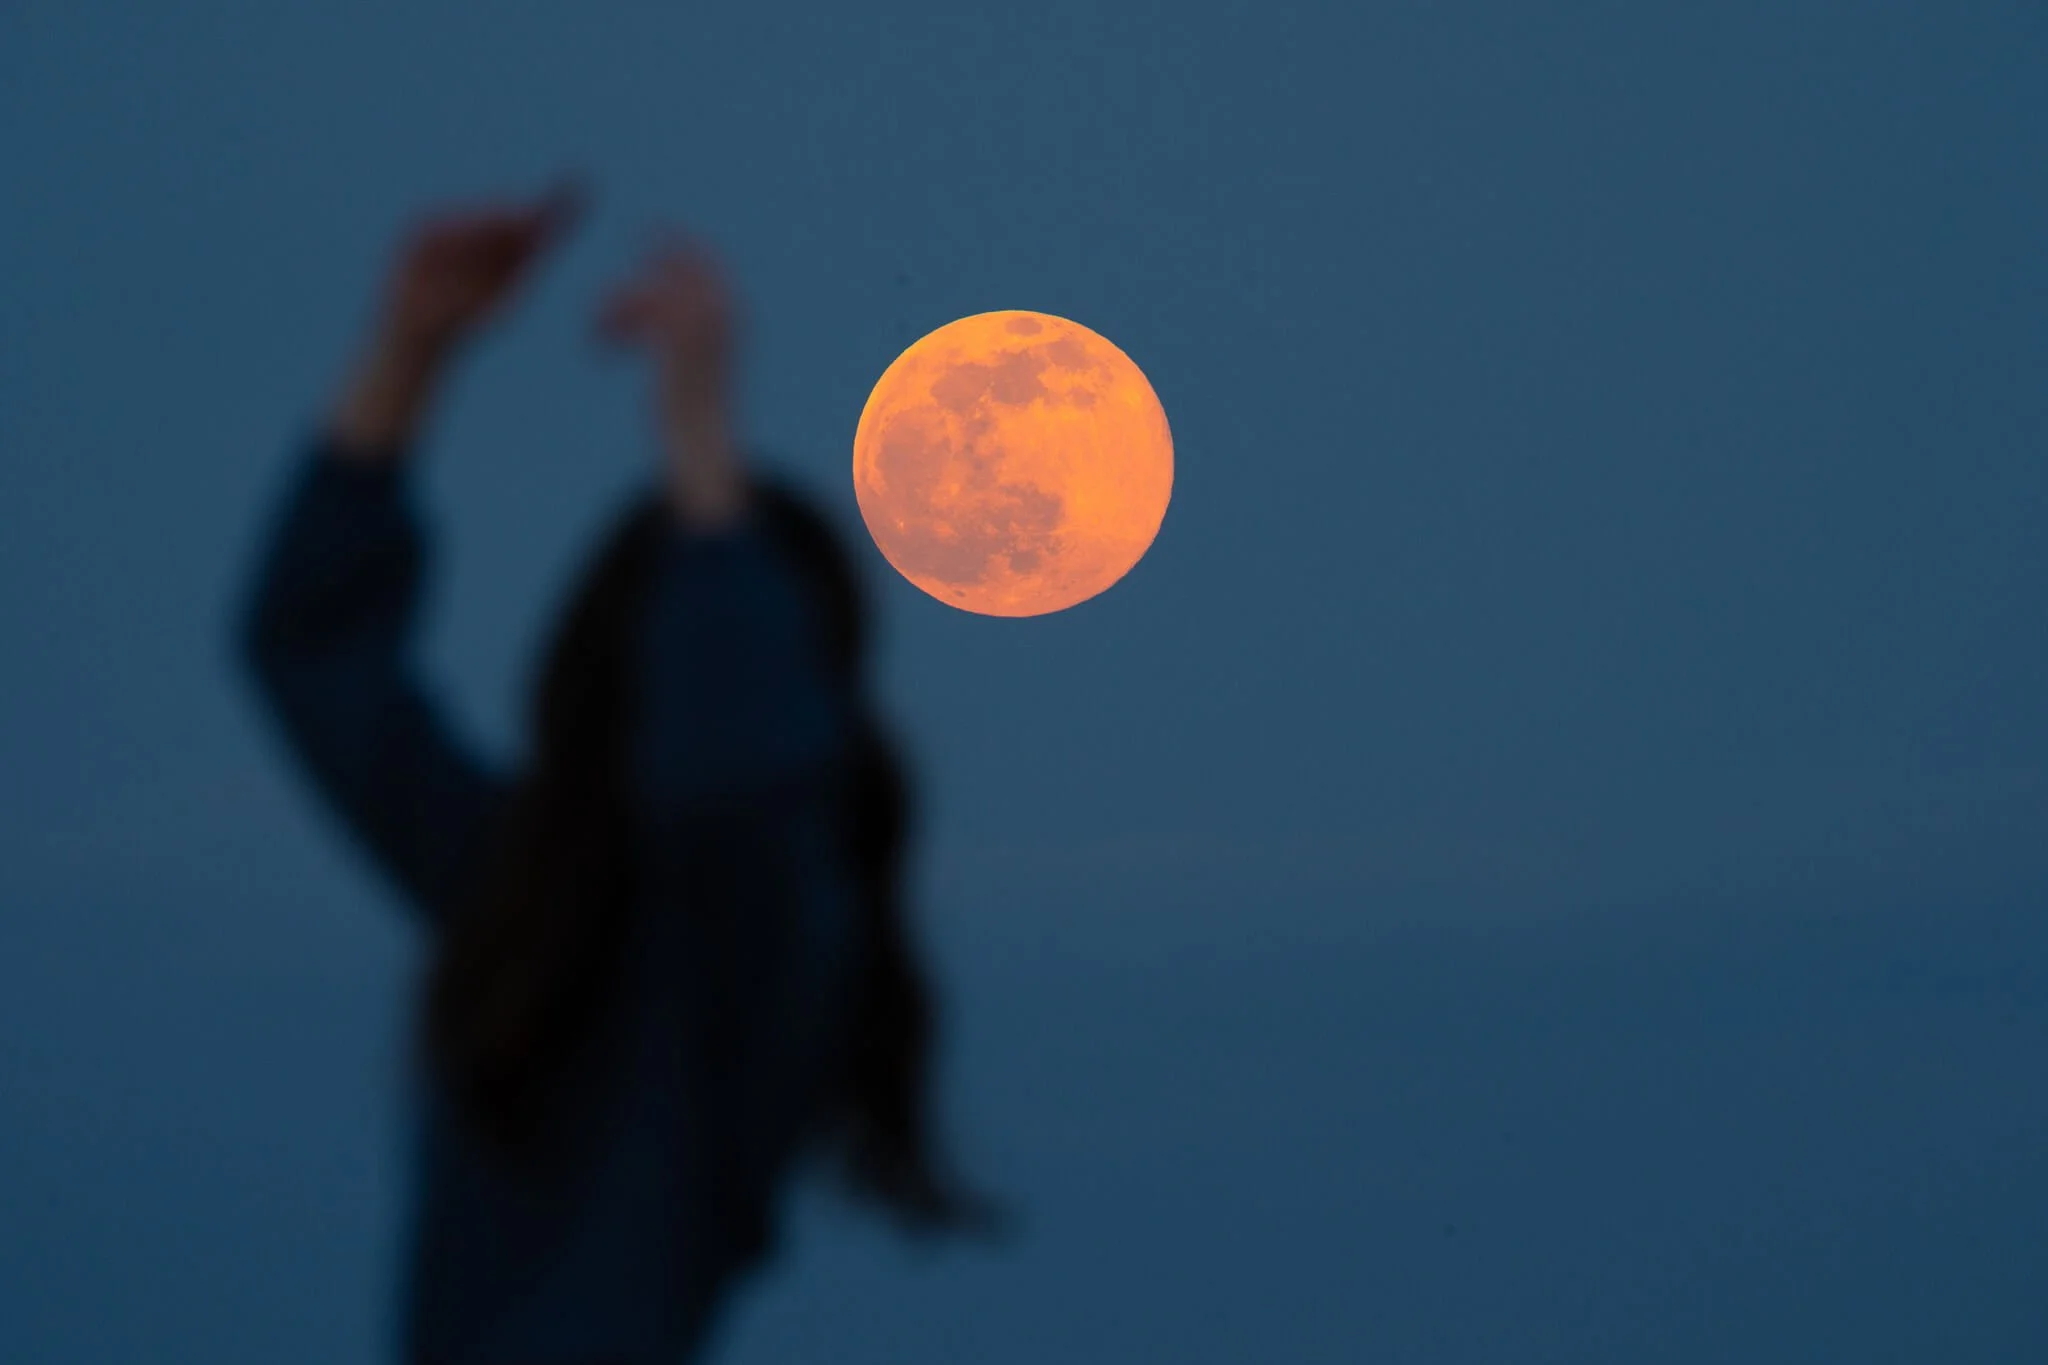
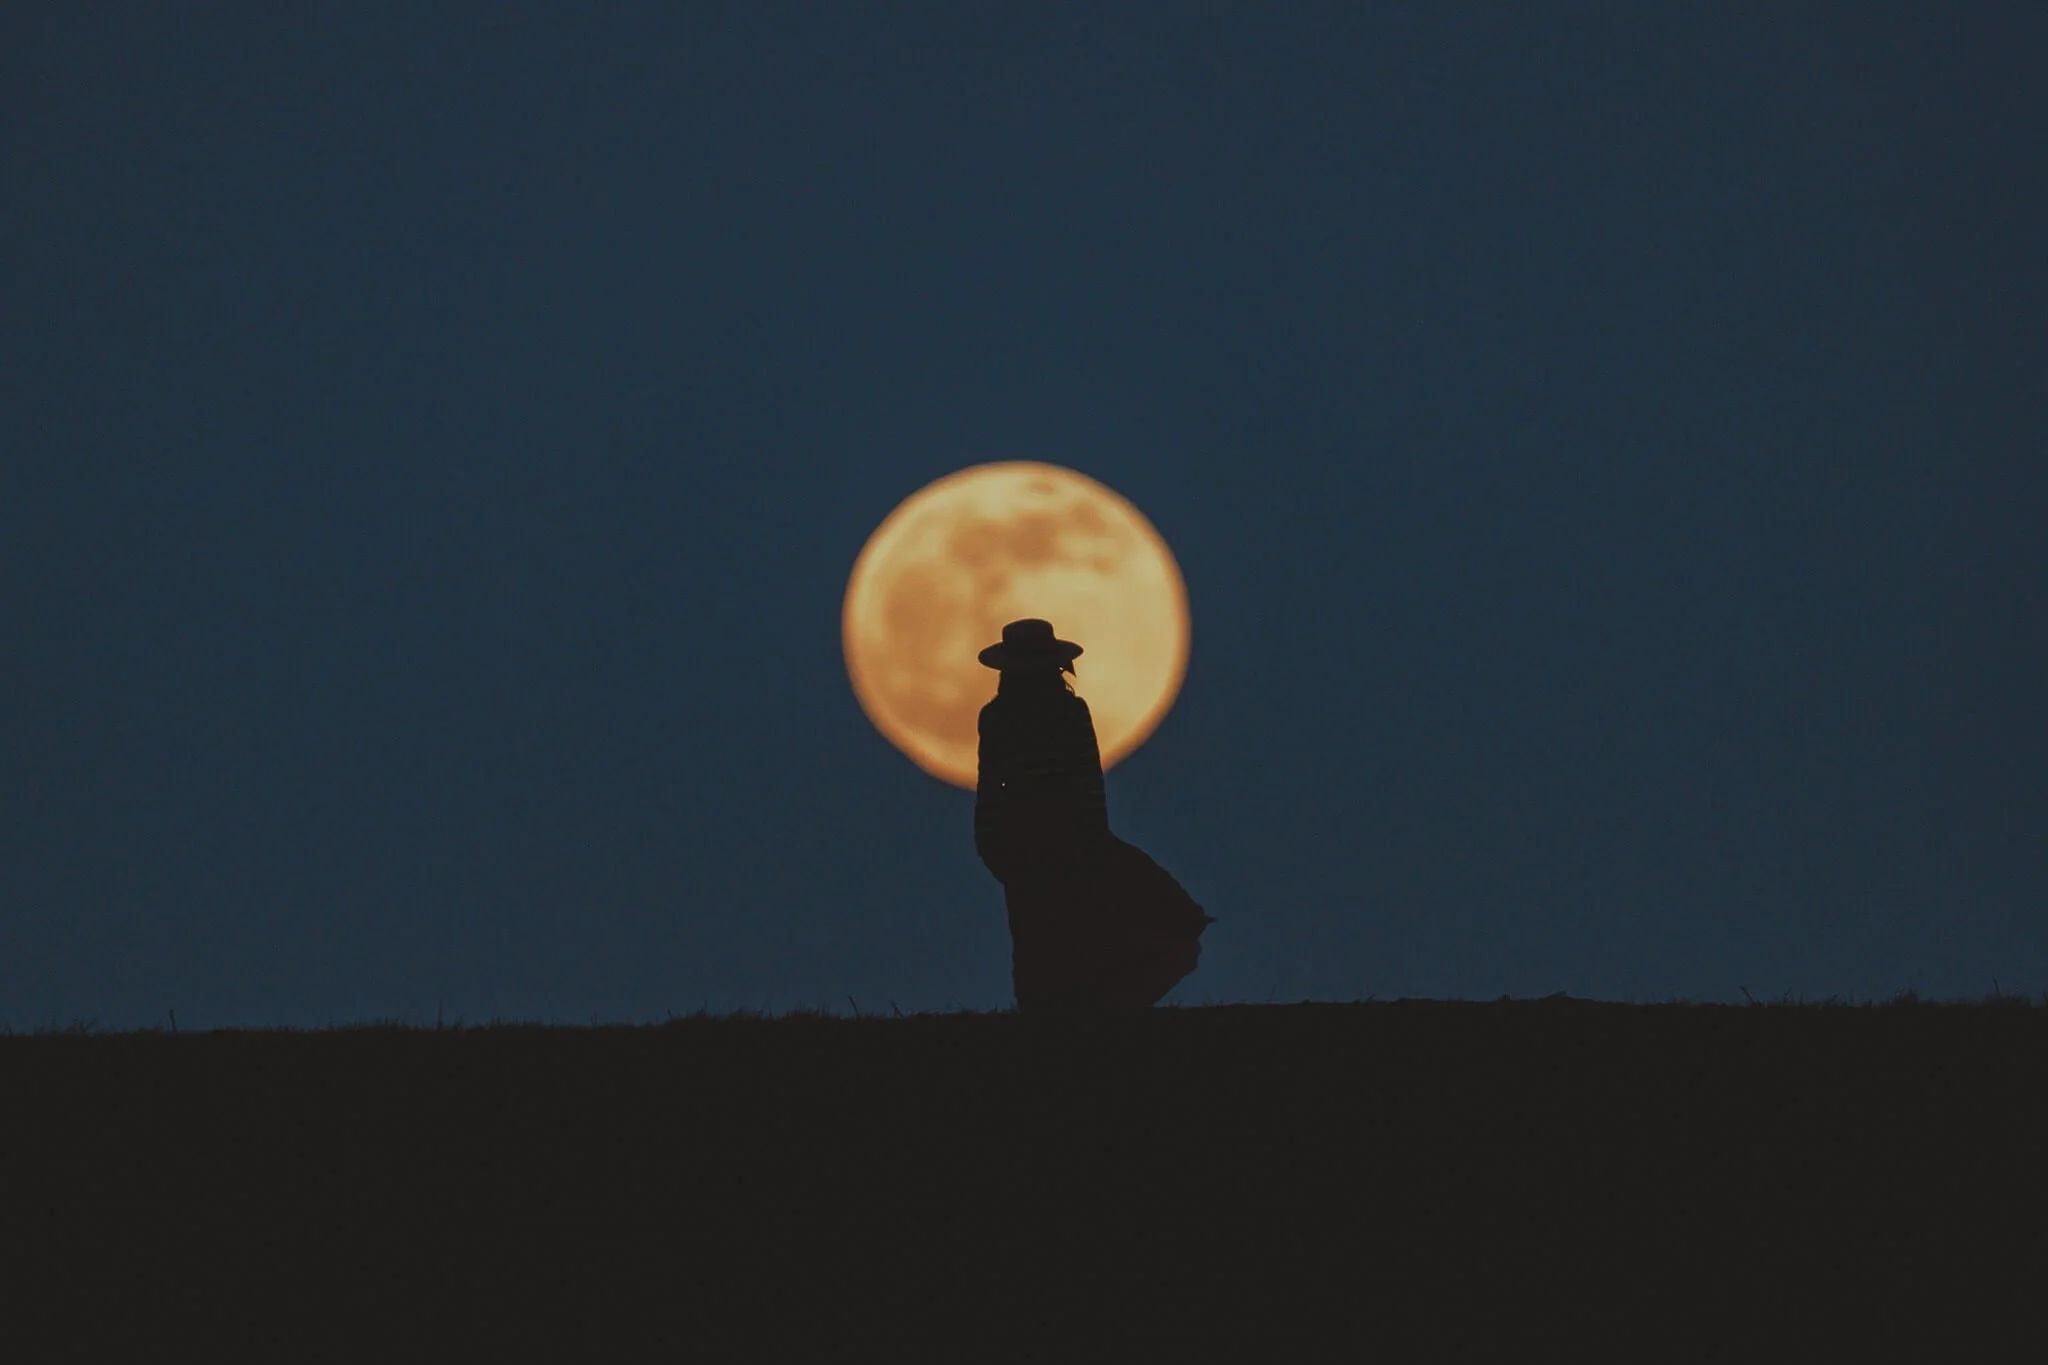
Full moons happen every month and are a great low-pressure opportunity to dial in your settings and get comfortable with telephoto moon photography. Moon-rise shots just above the horizon look especially dramatic and can be a very fun and creative component when mixed with silhouettes of people, trees,…
Supermoons occur when the full moon coincides with the moon's closest point to Earth (perigee), making it appear noticeably larger and brighter than usual
Partial lunar eclipses are easier to catch than a total eclipse and still look stunning in photos
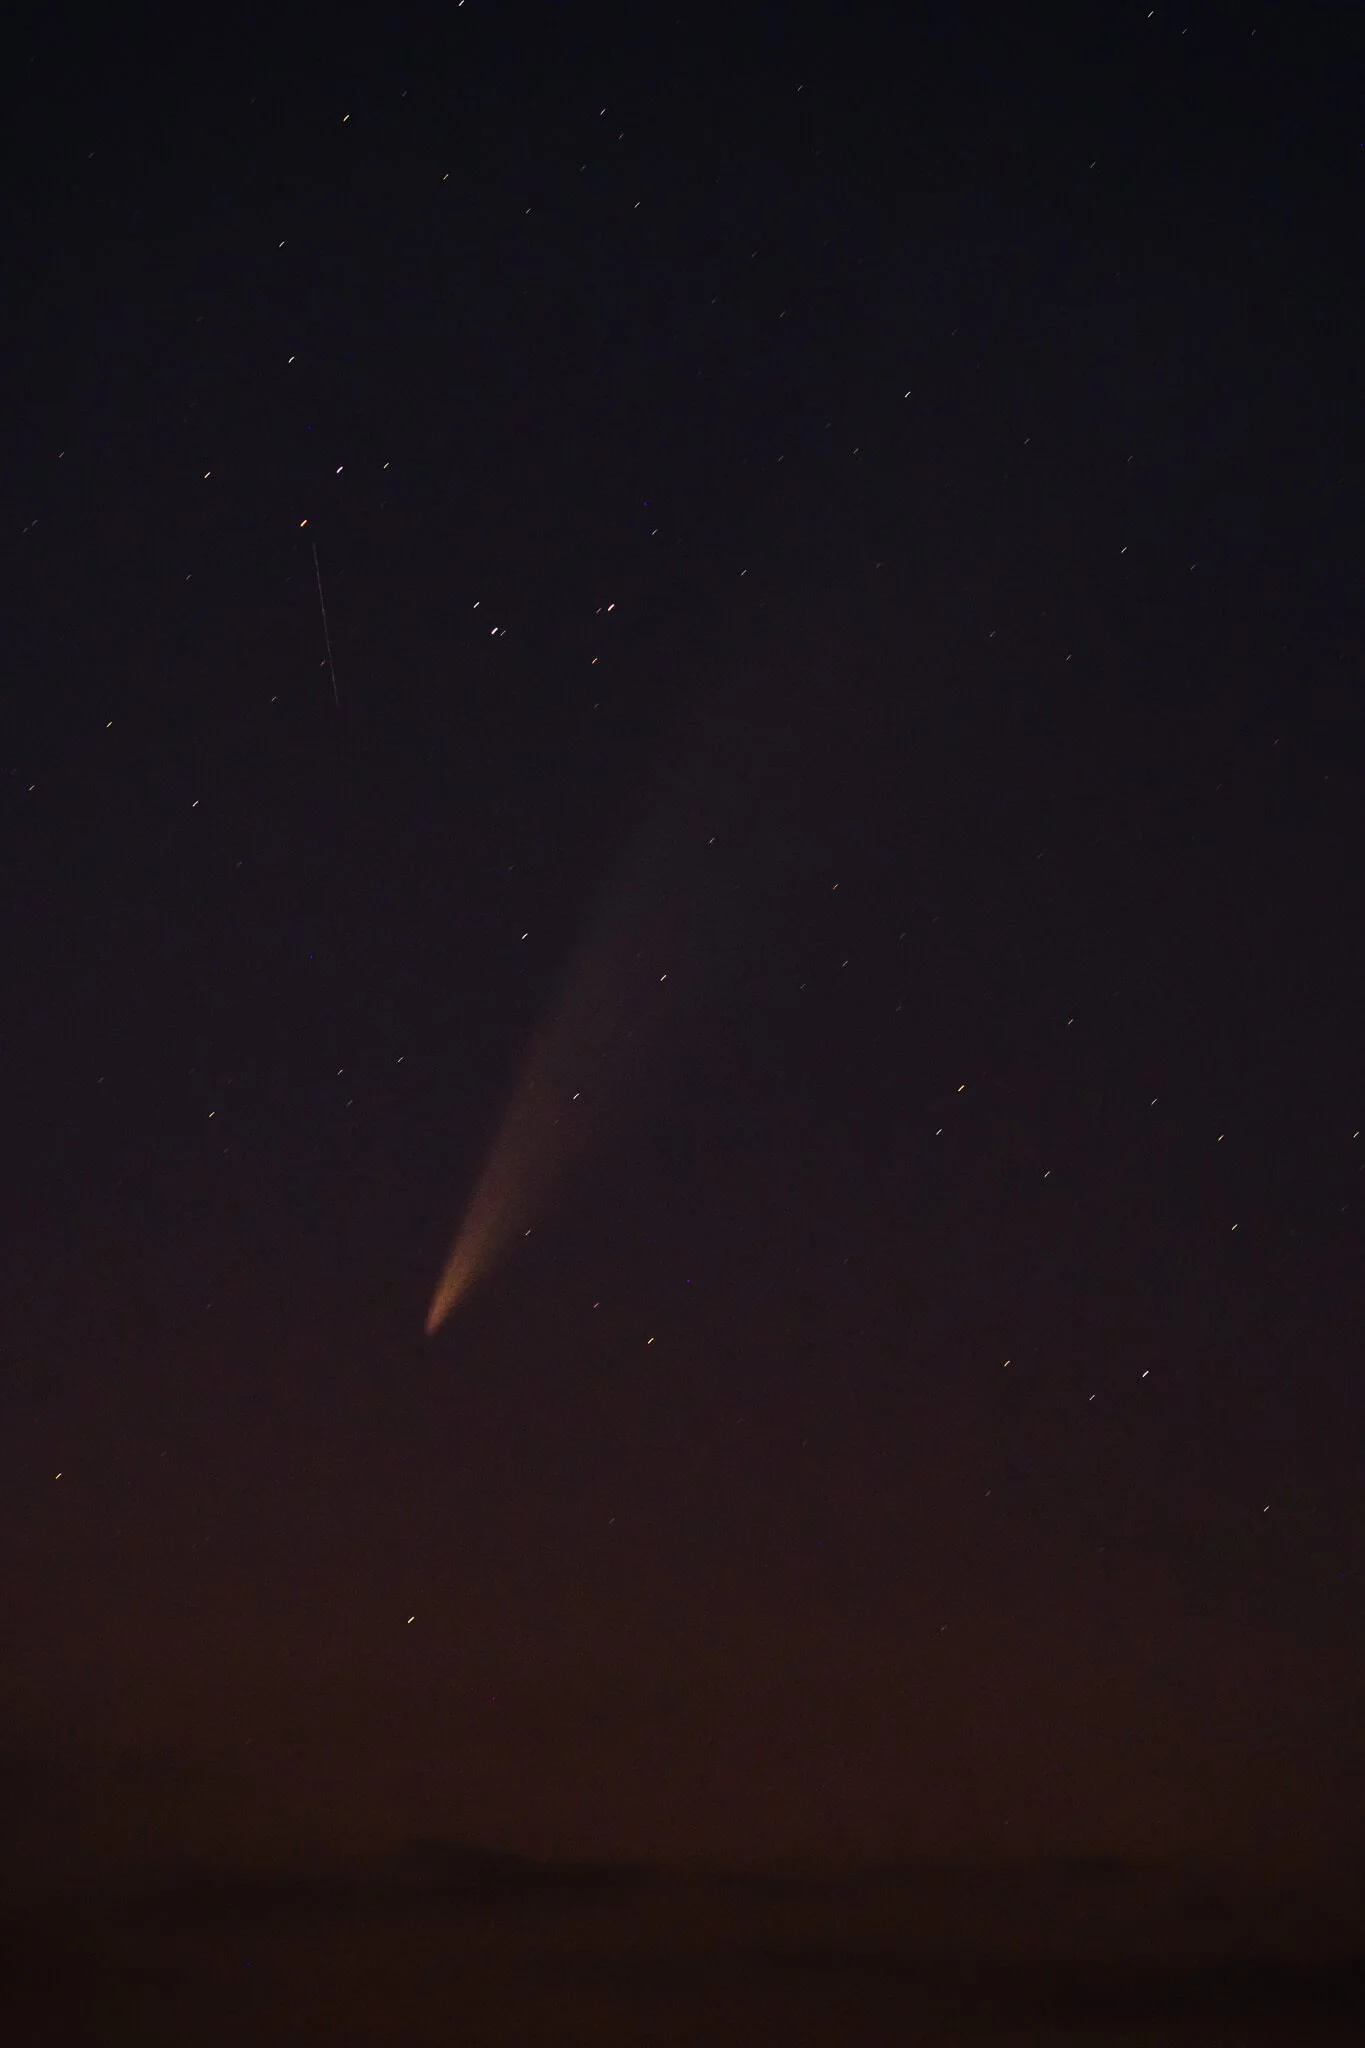
Meteor showers: the Perseids in August and the Geminids in December are the two best annual showers. You don't need a telephoto for these, just a wide-angle lens and a dark sky
Milky Way: I fully rely on the photo pills app to get the best information on when and where the galactic core is best visible. Generally speaking, Milky Way Season runs from around March through to October, peaking in the middle of the year. To get the best possible outcome, make sure you are in a place with very low light pollution and preferably when it is either a new moon or close to one, as this makes the Milky Way pop even more
I hope this helps you feel ready for giving astro photography a go!
Let me know if you have any more questions about settings or gear, and I’ll do my best to answer them.


captured with:
Sony A7iii
Sony FE 200-600mm f/5.6-6.3 G OSS
Sony FE 24mm f/1.4 GM


